Mixed Media Tutorial
This fun mixed media tutorial shows you how to create a whimsical dog portrait using a combination of colored pencils and watercolors!

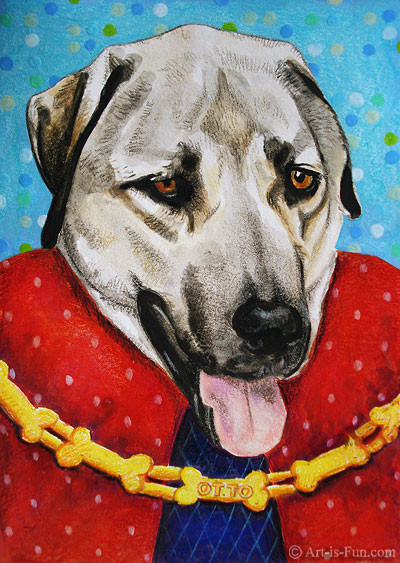
My subject for this piece is a dog called Otto. I wanted to create something a bit more lively than a straightforward pet portrait, so I adorned Otto in royal red attire with a gold bone chain. Pretty cute, huh?
In this mixed media lesson, I'll show you how I created this whimsical dog portrait from start to finish. Follow these steps to learn how to create your own mixed media art by combining watercolors and colored pencils!
Watercolors and colored pencils work really well together. When layered, they combine to create gorgeous textures and a rich sense of color.
Amongst the techniques you'll learn in this mixed media tutorial are:
how to create your own graphite paper quickly & easily
how to layer watercolors and colored pencils
how to thin watercolors to create translucent colors
how to use masking fluid
These are all tricks and techniques that you can carry with you into future mixed media projects!

Materials needed:
I've provided links below to the relevant products so that you can easily find them on Blick Art Materials, my favorite online art supplier. I'm a member of Blick's affiliate program, which means if you make a purchase after clicking on one of these links, I'll receive a small commission (at no extra cost to you). Your purchase helps support this site and keeps it free of ads. Click here for more info.
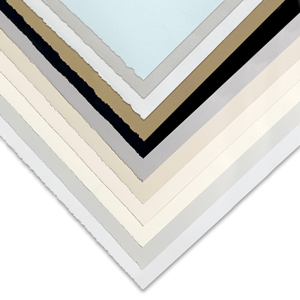
- Watercolor Paper - I used Stonehenge paper. The paper you will use needs to be heavy enough to accept multiple layers of watercolors and colored pencils, so avoid using regular drawing paper. Choose something 120lb (320gsm) or higher.
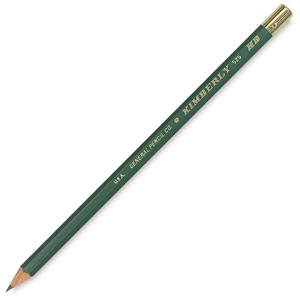
- Pencil - the softer, the better. I used a 6B.
- Ball-point pen - you'll find out why in a sec!
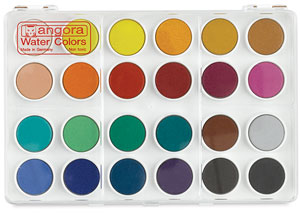
- Watercolors - I used an inexpensive student set of pan watercolors.
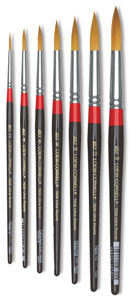
- Paintbrushes - You'll need 2: one for watercoloring, and one for applying the masking fluid. I used a Size 2 round paintbrush for watercoloring, and a Size 0 round paintbrush for applying the masking fluid. I find that it's best to use a cheap/old paintbrush for masking, because masking fluid can easily ruin a brush.
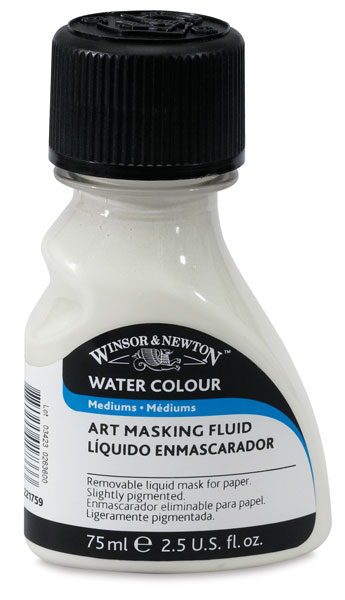
- Art Masking Fluid - I used Winsor & Netwon's Colorless Masking Fluid.
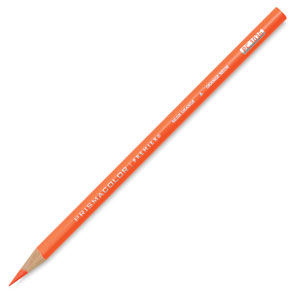
- Colored Pencils - I used Prismacolors, my favorite!
- Paper print-out of the dog photo - to transfer the image, or you can just eye-ball it
Ready? Let's begin!
Here is the reference photo I used for this mixed media tutorial. To print out and use this photo for practice, click on the photo and it will open in a new tab or window. Then you can copy and print the photo. Please note that the photo is copyrighted (as with all the other images on this site) so it can't be used for commercial purposes. Thanks!

I printed out a black and white copy of the photograph, and trimmed it to size (5" x 7"). I cut a large piece of Stonehenge paper to the same size:

How to make your own graphite paper
The quickest and easiest way to transfer the photo onto paper was to essentially "create my own graphite paper"! This is a really cool technique that can save you a lot of time when transferring photos or designs onto your paper or canvas.
All you need is a paper print-out of your reference photo, printed on normal printer paper. Flip the print-out over and use a soft graphite pencil, such as 6B or 8B, and cover the back of the print-out with scribbles:

It's easiest to fill the paper by using the side of the pencil lead and allowing it to go blunt.
Here is how the paper looks when the back is all covered in scribbles:
Note that I only scribbled in the part where the dog's head is. No need to waste graphite by covering the entire paper, when I only need his head.

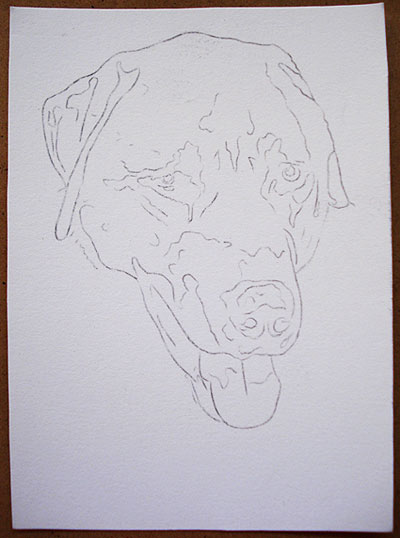
Flip over the print-out and place it on top of your watercolor paper, with the image facing up. Tape or clip the papers together so that they stay securely in place. This is important - if either one shifts while you're transferring the image, your drawing won't be lined up correctly.
Use a ballpoint pen to trace the outline of the dog's head. Trace his eyes, nose, ears, mouth, tongue. Also make some marks to denote areas of shadow or highlights.
The pressure of the pen will transfer the pencil marks you made on the back of the print-out onto the watercolor paper, giving you an accurate rendering of the dog. Cool, huh?

A ballpoint pen is ideal for this because the pressure will easily transfer the graphite onto your paper.
You could also use a mechanical pencil for this task, but ballpoint pen is much easier to see.
Here is how the print-out looks, with all the important parts traced with pen:
(Note how the print-out and drawing paper are securely clipped together.)

Here's what your watercolor paper will look like after you've finished tracing:
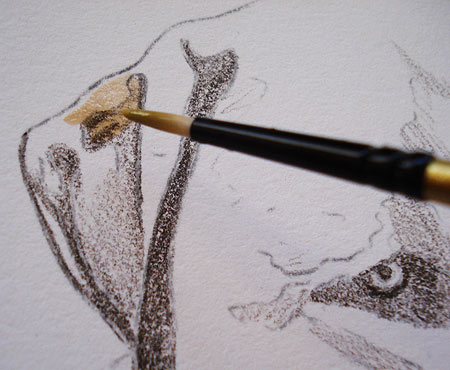
Next, I used a sepia colored pencil to color in the darkest part of the dog's face, as well as some of the mid-tones.
I find that coloring in the darkest parts first helps to transform a confusing outline into a more identifiable image.

Now it's time to add some watercolors. I mixed a very watery yellow ochre color, like so:

And then lightly applied the ochre watercolor paint to various parts of the dog's face:
Here's how Otto looks after the first watercolor application:
I started out lightly (as you see above), then added some darker, richer watercolor colors (as you see below):

He's starting to take shape!
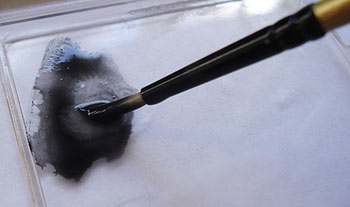
Next I added some black. I applied heavy, highly-pigmented black paint, as well as thin, watered-down black.
To make the black as dark and pigmented as possible, I wet the brush and swirled it in the black watercolor pan. When it was wet enough, I lifted the brush and painted the heavy black onto the darkest parts of the painting.
To make the more watery black (like a smoky grey color), I used my brush to the wet paint from the pan (as shown below) and deposited the paint onto the plastic tray, where I added more water as needed to "lighten" the black.
Essentially, adding water disperses the pigments, spreading them out, which is why the paint looks lighter.

Wetting the black
Watering down the black paint
In the photo below, you can see 2 distinct applications of the black watercolor paint:
The heavy black on the left, forming the shadow under the dog's ear
The lighter black under the brush, forming a smoky grey shadow
Below you can see how Otto looks after black watercolor paint has been added. I also painted his tongue a light pink.
Note which areas are very black and which areas are lighter, like grey. The difference in tone is simply due to the amount of water that was added to the paint.

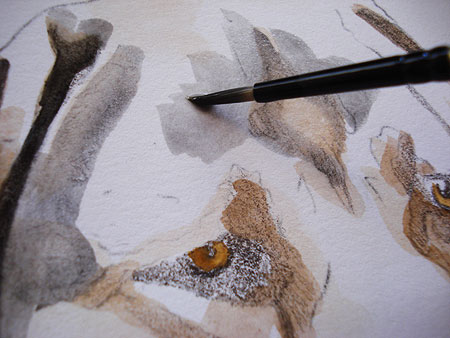
The next 2 pics provide close-ups that show you how the layers of colored pencils and watercolors look in more detail. Here you can more clearly see the different gradations of black watercolors.


Next, I continued adding more black watercolor washes, which help Otto's face look more 3-dimensional. I also added some shading to his tongue.
I also began adding more details with the black watercolors:

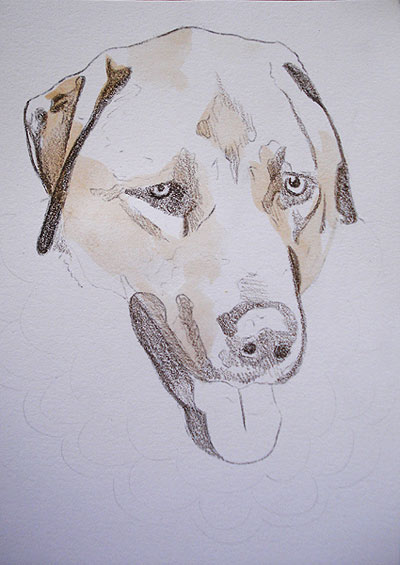
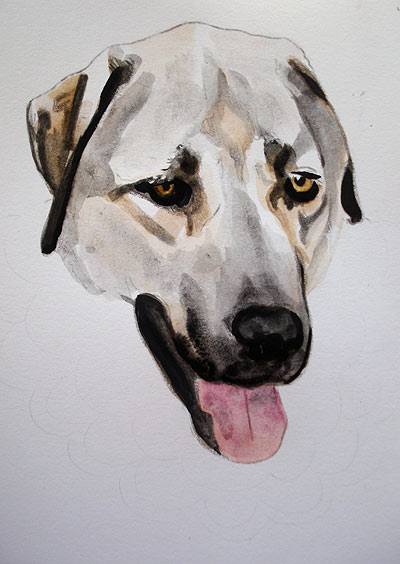
Here's how Otto looks after I finished adding details in watercolor:

Next, I added more details with colored pencils. I only used 4 colors: black, cream, sepia, and warm grey 20%.
I used the colored pencils to add texture and shading. They were especially useful to create the appearance of fur:
At this point, Otto's head is done!
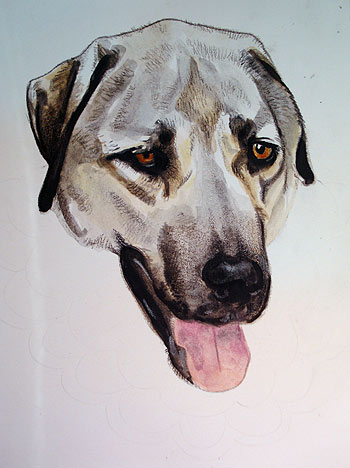
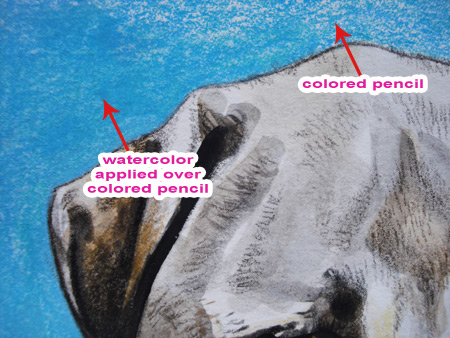
In the close-up below, you can see how the different layers of watercolor and colored pencils combine to create his portrait:

Here's another close-up, so you can see how the watercolors and colored pencils can be used to create certain textures:

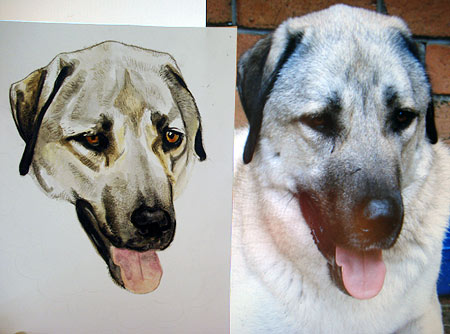
Below is a pic of Otto's portrait held up to the reference photo on my computer screen, so I could determine whether his head was finished.
After deciding I was happy with the likeness, I moved on to his outfit.
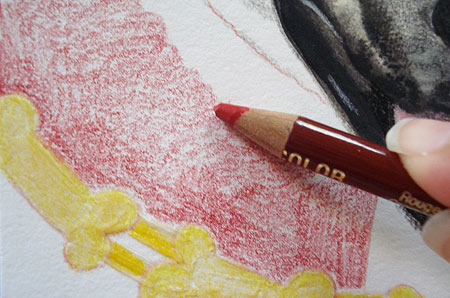
Using a red colored pencil, I lightly marked out the outline of his royal red robe and his golden bone chain:

My goal now is to color in Otto's red robe. To do this, first I mask his gold bone chain.
What is a "mask", do you ask?
To mask an area means to cover it with a protective substance, such as masking fluid, a frisket, or even tape. The mask allows you to easily paint around and on top of the masked area, without needing to worry about the paint getting on the masked area. Once the paint is dry, the mask is removed and if done correctly, the area underneath the mask is as pristine as when you'd started.
Masking is an especially handy technique for keeping certain areas of a painting white, for example.
How to apply masking fluid
Dip your (inexpensive) paintbrush into clean water to moisten the bristles. Masking fluid can be quite brutal to a brush, so it's best not to use an expensive brush.
Lightly run the bristles over a moistened bar of soap. This will help protect the bristles of your brush.
Dip the brush in masking fluid and apply it to your paper. Try to work quickly.
Every 30 seconds or so, clean your paintbrush thoroughly in soap and water. The masking fluid will start to harden on your brush right away, so if you wait too long to clean your brush, the bristles might harden into an unusable clump.
Repeat the first 4 steps until you have finished applying the masking fluid.
Clean your paintbrush in soap and water.

In this photo, you can see how I applied the watercolor masking fluid to the bones, starting on the left.
After the masking fluid is dry (which won't take long), you can now work around and on top of it with other media.
I started with a layer of colored pencil:
Drawing with colored pencil around the bones
Next, I added the first layer of watercolors. As you can see from the pic below, it's okay if the watercolors overlap the masked areas.
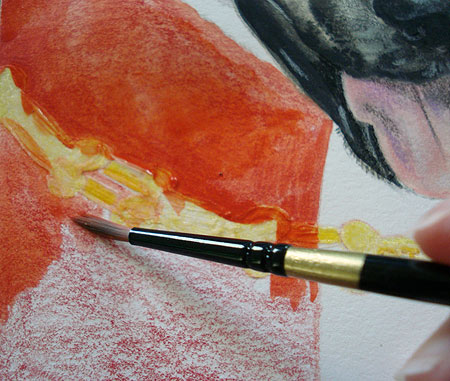
Then I added more layers of watercolors, to give Otto's royal red robes a sense of richness and form:
In the photo below you can see how the royal red robe now looks. I added dark colors to the areas around the gold bone chain, to act as the chain's shadows.

Here is a close up that shows how the paint looks after being applied over the masking fluid:

Once the paint is completely dry, you are ready to remove the masking fluid! Make sure that the paint is totally dry though, otherwise you may mess up your beautiful layers of paint.
There are a few different ways to remove masking fluid. Some people like to rub an eraser over it, which lifts off the masking fluid.
I like to rub it off with my fingers. It comes off really easily:

After the masking fluid is loosened, I peel it off (which is kind of fun, actually!):
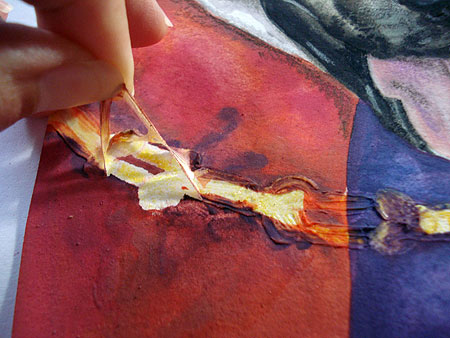
See how the area underneath the masking fluid isn't red like the area around it? The masking fluid worked!
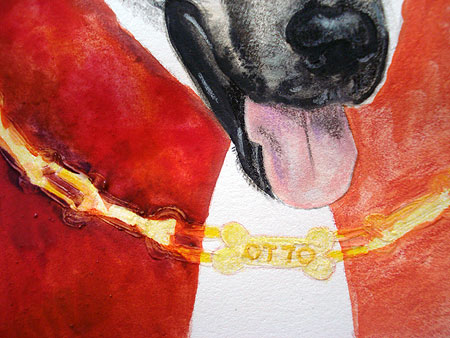
I then used colored pencils to create the "gold" look of the bones on Otto's chain, and added a few more layers of red to his robe:

I also applied black colored pencil underneath the chain to create a shadow.
Let's take a look at Otto now!

Nearly finished...
The close-up below shows in more detail how I used white colored pencil to add the white dots to his robe, and used a light blue colored pencil to draw a simple criss-cross pattern on his violet shirt:

The final step is to finish the background. First I colored it in with a light blue colored pencil, and then went over it with a similar hue in watercolors:
After the watercolor dried, I added several dots to the background, using colored pencils in different colors. It adds a whimsical feel!
Here's the finished mixed media portrait:
I hope you enjoyed this mixed media tutorial as much I did creating it!
Try to think of ways you can apply the techniques you learned from this mixed media tutorial into your own art. Why not use this mixed media tutorial as inspiration for drawing and painting your own mixed media pet portraits?
As you saw in this mixed media tutorial, watercolors and colored pencils make such a great combination, that it's well worth a try!

Read More
Read an overview of mixed media art.
Get inspired by the creative art of mixed media artist, Richard Tuvey.
Check out more painting lessons.
Colored Pencils Guide
Learn more about the different types of colored pencils available today in my Guide to Colored Pencils!
Realistic Colored Pencil Techniques
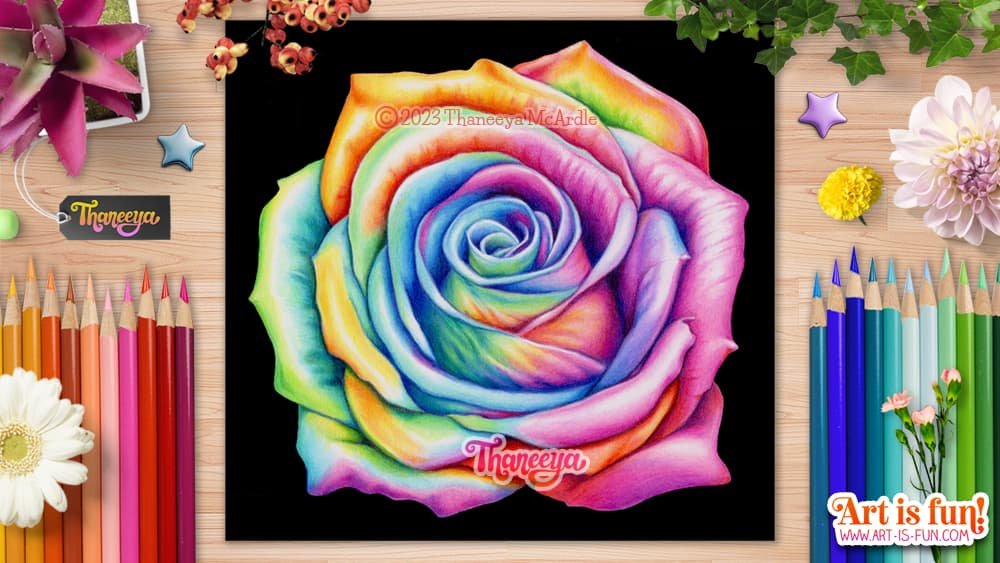
Learn the best techniques for creating realism with colored pencils, as you watch me create this rainbow rose from start to finish!