Art Projector Guide
An art projector is a handy tool for artists of all skill levels. For example, Photorealist painters traditionally used a projector to enlarge and transfer the image from their small photo onto a large canvas. In addition to projectors, there are also 2 other methods you can use to enlarge an image: the grid method and transfer paper.
How do you decide which of these 3 methods is easiest for you? Read through these pages to compare and contrast the different methods and processes, starting with the almighty projector. Buying a projector can be a costly experience (depending on the type you want and whether you buy it new or used), so read through this page to help figure out which type of projector is best for your needs and your budget.
This page discusses 4 kinds of projectors:
Digital projectors, also known as home theater projectors, have become so cheap and bright in recent years that they’ve become a popular choice for tracing and enlarging artwork.
They can project photos and videos from nearly any digital source: computers, memory cards, digital cameras, and even smartphones. The advantage of this is that you don't need to print out the image or have a slide or transparency made (like people had to do in the "old days"!). It's super-convenient!
These days people often buy digital projectors for watching films at home, and if that’s important to you in addition to enlarging images for art purposes, then your decision can get complicated and expensive. You’ll want a bright projection with sharp details, so you have to think about technical specifications like the display method (DLP vs LCS vs LCoS) and you can easily spend thousands of dollars!
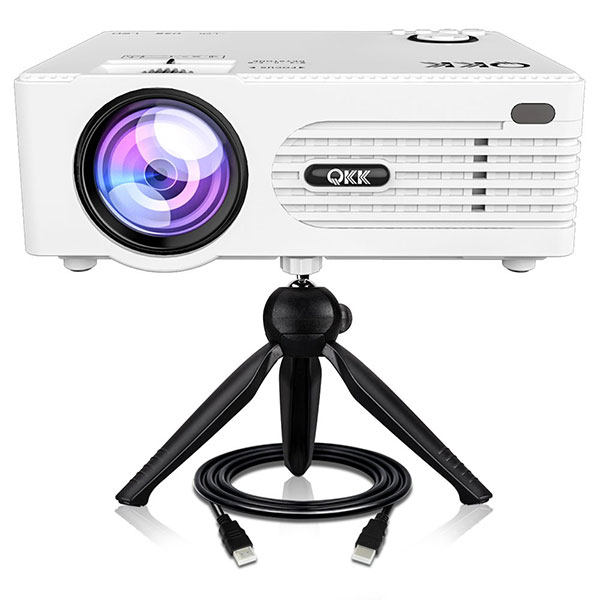
But for the purposes of image transfer and enlargement, you often don’t require such clarity (unless perhaps you’re a Photorealist). Therefore a cheap LED projector (around $80) should be fine for most artists. You don’t need to worry about the display method, but I do recommend you get a projector that projects the light with LEDs rather than bulbs. LEDs last much longer than bulbs and require far less maintenance. Even cheaper projectors offer LEDs that will last for over 30,000 hours!
LED projectors are also ideal because they provide fantastic brightness. Even the cheapest models can exceed 2,000 lumens! This means that you don't need a dark room to see a clear projection (although it can still help). Increased brightness also allows for bigger projections, which is perfect for muralists.
LED projectors are also very portable, especially given their brightness and clarity. For most models you’ll still need a tripod and possibly an extension cord, but many models come with carry cases and weigh no more than a few pounds. You can even buy ultra mini projectors that literally fit in the palm of your hand!
I still use an old art projector I bought years ago and don’t have the resources to test out the different LED projectors that are now available, because that would get quite costly. But based on the specifications and the crucial criteria I’ve listed above, I’ve listed some affordable and portable models below to get you started. Note that while these may be fine for tracing artwork, they’re probably not ideal for watching movies. If you’re interested in using your projector for both art and entertainment, you might consider doing some more research and increasing your budget.
It’s also worth noting that different artists have different needs. While a $80 projector is fine for most artists, some artists who create detailed artwork or need to replicate very accurate colors may benefit from a more expensive product. Or if you’re a muralist who frequently works outdoors, you’ll want to look for the brightest projector you can find. For this reason, I’d recommend you purchase from a retailer, like Amazon or Best Buy, that allows you to easily return the product if it doesn’t fulfill your needs.
The products below are available on Amazon. As an Amazon Associate I earn from qualifying purchases.


Digital Art Projectors vs. Home Theater Projectors
On this page I used to recommend so-called "digital art projectors," made for the express purpose of tracing or enlarging art. They were similar to the projectors discussed above, but came with extra features designed specifically to help artists: custom grid layouts and built-in image functions like flip, skew, and rotation controls. They were also billed as being brighter, more portable, and as having better color accuracy and contrast than other projectors. The catch was that they were expensive, with some models costing over a thousand dollars.
But in recent years, digital home theater projectors (especially LED projectors) improved so much that it no longer makes sense to spend so much on a digital art projector. However, if you're interested in checking them out, Blick still sells the Artograph Flare 450 Digital Projector (affiliate link). In addition to added features for artists (like 12 built-in grid patterns), its biggest selling point is portability thanks to the small size and built-in battery.
Opaque Projectors
UPDATE: In the 15+ years since I first wrote this article, the projectors discussed below (opaque, slide and overhead projectors) have been made mostly redundant by the emergence of super cheap digital LED projectors (see above). But these older projectors still work well for transferring images, and there’s still quite a few old models around, so I’ve kept this information intact.
If you plan to do a large scale painting, you could also look into using an opaque projector, which will enlarge your image so that you can trace the outline.
Opaque projectors work by shining a bright light onto an opaque object (like a photo or a sketch) and then using a combination of mirrors or prisms and a lens to focus an enlarged reflection onto a surface.
They're not digital, so instead of using an image file, you need a sketch or a photo you've printed out. This is less convenient, but might be preferable if you're enlarging your own sketches, thereby saving you the step of having to scan them. Before we delve deeper, let's get an overview of how to use an opaque projector.
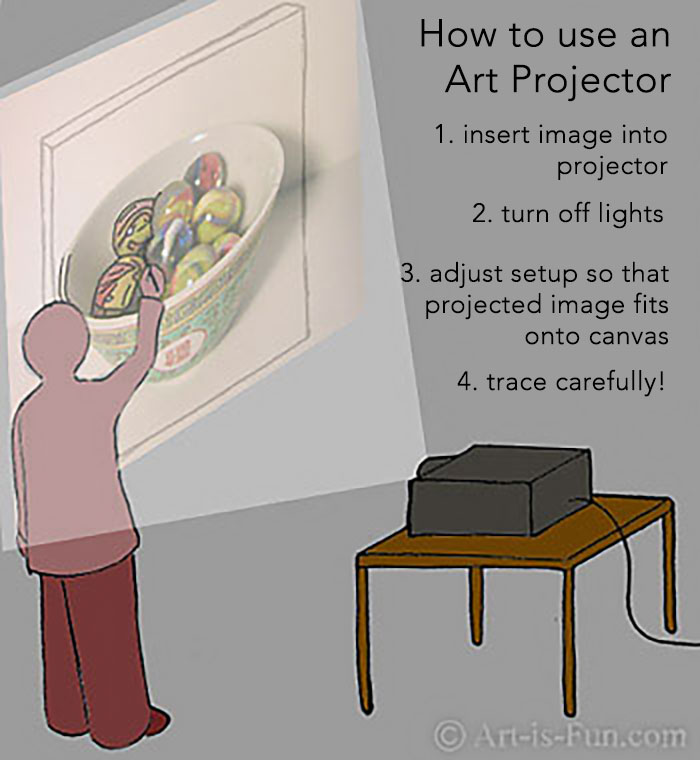
Here's how to use an opaque projector:
You will need a small paper copy of your photograph, between 5 sq inches and 7 sq inches, depending on the size of your art projector's opening. Place the image in the opening, turn on the machine and turn off the lights in the room. Make sure you have enough space to be able to pull the machine far back if you need to make a really big version. The projected image will appear on the wall, so you'll need to position your canvas securely on the wall, and arrange the projector so that the enlarged image fits correctly within the size of the canvas. This might take some fiddling to get it just right. Double-check that the canvas is perfectly straight and flat against the wall, and that the projector rests perfectly flat upon its surface - otherwise the picture will turn out slightly distorted. You can see the illustration below for an idea of how it all works.
You'll need to make sure that the art projector stays in place the entire time as you are drawing the image. Keep the dogs, cats and tiny children out of the room. The slightest nudge of the projector will knock the projection out of alignment, and it may or may not be easy to realign the projection with your previous tracings. You don't want to take any chances! For the same reason, make sure you have enough time to trace the whole thing in one go.
Pros and cons to using opaque projectors
The pros to using an opaque projector is that it is an easy way to enlarge to a really big scale - anything over at least 18" x 24". If you plan to work on a scale that is 16" x 20" or smaller, I would suggest using one of the other methods of transferring the image, such as the grid method or transfer paper, which will save you some money.
Opaque projectors also require a print out of a photo or a physical sketch to be projected. While this is much easier than other projectors that require slides or transparencies, it's not as convenient as digital projectors that can utilize digital image files and even video. The print out must also be small to fit on the projector (usually 7" sq or smaller), which can be a hassle if your source image is larger.
The cons to using an opaque projector are (1) the expense and (2) the need for a dark room. Let's look at these 2 points further:
- It's probably only worth investing in an art projector (of any type) if you think it will get a lot of use. While opaque projectors are generally much cheaper than digital projectors, you can still spend hundreds of dollars. A very basic opaque projector will cost you about $40, but it won't be able to give you as much detail, clarity or brightness as the professional models, which can set you back as much as $400. In the past, I've struggled with cheaper models when it came to detailed artworks. Some areas were blurry and I couldn't see the details I needed (which had to be penciled in later using good old-fashioned hand-eye coordination). So it depends partly on your style of artwork and how much enlargement you need.
- Opaque projectors require a dark room for you to be able to see the projection clearly. This can be annoying or downright difficult - although if you need to, you'll probably learn to adapt and make the best of it (which is what I did). If you can afford it, consider getting an LED projector, which can handle more ambient light and has loads of other perks as well.
Opaque projectors also use light bulbs, which aren't as bright as LEDs, don't last as long, and can heat up, which is why some projectors come with internal cooling systems. But they do make for a simpler device, so if something goes wrong with the bulb, you can usually change it out yourself.
Because opaque projectors have been mostly replaced by cheap LED projectors, there's really only one model that's widely for sale (see below). But you might be able to find some great deals on secondhand models, so I'd encourage you to look around.
The Artograph EZ Tracer Art Projector (Amazon affiliate link) costs around $40 and is a cheap, entry-level projector that's best for children or beginners. It's relatively portable, but can only enlarge photos to 2.5 to 5 times their original size. But it might be perfect if your only goal is to enlarge simple sketches from your notebook so you can transfer them to a larger surface like canvas.
As an Amazon Affiliate I earn from qualifying purchases.

Slide Projectors
The original Photorealists of the late 1960s and 70s commonly used slide projectors to enlarge their images. They would have slides made of their photographs, insert the slide into a slide projector and trace the enlarged image onto their canvas. The process is basically the same as using an opaque projector, only you will need to have a slide made of your photo.
You will also need a slide projector. You can acquire either new or used slide projectors from Ebay or Amazon. The used ones often sell at a deep discount to the original price. Although I haven't used a slide projector myself for the purpose of tracing the enlarged image, I imagine that a crisp, clear slide inside a good slide projector should make a really accurate enlargement that would be easier to trace than the projection you would get from of a middle-range opaque projector.
Important Tip When Using Slide Projectors:
““When using a slide projector you have to be careful of lamp life. I once did a large drawing only to have the lamp burn out right before I was done. Trust me you can never line up the image again.””
Overhead Projectors
When I was a student in school, all the teachers used overhead projectors to project their lessons onto the wall, and the images were always quite crisp and clear. Like opaque and slide projectors, overhead projectors have been larely replaced by cheap digital projectors. But if you have access to an overhead projector, they're still an excellent candidate for enlarging reference photos!
To use an overhead projector, you will need a transparency of your reference photo. These days you can get printable transparencies (affiliate link) that go through your inkjet printer, laser printer or copier, so you can quickly and easily print them off yourself (make sure the transparency you buy is compatible with your printer).
The downside is that new overhead projectors do cost a few hundred smackeroos, which is pricey if you're on a budget or aren't sure how much you'll use it. You can still buy them new, like this Apollo Overhead Projector (affiliate link). But I'd also encourage you to check out sites like eBay where you can find great deals on secondhand models, or check if your school or work has one that you can borrow.