Mural Techniques
Read on for mural techniques and tips for painting wall murals! Now that you've gathered all the mural painting supplies that you'll need, read through these pages to learn:

Before you begin painting, you need to check the wall and prepare your workspace.
Clean the wall
First, make sure that the wall is clean and not suffering from any moisture damage or structural problems, such as cracks. If you notice cracks, spackle them, but be aware that there may be an underlying structural issue that could eventually cause cracks across your mural. Examine the wall closely for signs of mold, dirt, wax, oil or grease. If you find any, clean it off thoroughly, and be aware that mold or mildew may return unless the underlying cause has been rectified. Even if the wall looks clean, it's a good idea to wash it anyway with a mild soapy solution, such as T.S.P. Cleaner (trisodium phosphate), to ensure that you are starting with as clean a slate as possible.
Next Step: Priming the Wall
Priming the wall is an important step in creating a mural, because the primer will help the paint stick to the wall more easily.
In some cases you can apply the primer directly over the pre-existing paint on the wall, and the mural will be fine. It depends on how much elbow work you want to put into it and also on how long you want the mural to last. If you are really concerned about the longevity of the mural, then you should take some additional preparatory measures before you start painting.
To get the most permanence and best adherence of acrylic paints onto the wall, strip the existing paint off the wall by sanding it with a sanding block. To reduce the amount of dust caused by dry sanding, prepare a mild soapy solution by mixing TSP or dishwashing liquid with in a bucket of water. Dip the sanding block in the bucket of cleaning solution, squeeze out the excess water and sand the wall thoroughly. Allow the wall to dry.
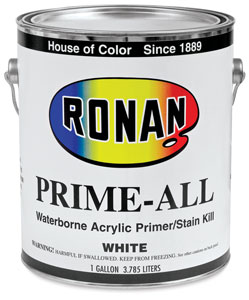
After the wall has thoroughly dried, apply a coat of acrylic primer over the entire wall. You don't want to buy regular acrylic primer (such as gesso) that you would use for a painting because it's expensive when used in large quantities. Instead, buy something like Ronan Prime-All (this links to Blick Art Materials, and if you make a purchase I get a small commission that helps support this site). You can also get acrylic primer from a home improvement / DIY store in a gallon can, which will get you better bang for your buck.
Now, you have three choices:
- You can start painting directly onto the wall. This is what most people will want to do at this point. If you're ready to paint, skip ahead to the next section.
- You can add texture to the wall (for example, by applying plaster). This can create an interesting surface, but be aware of how it will affect the final painting. Will it add to the look or would it be an unnecessary distraction?
- If you prefer to paint on canvas, you can adhere a large piece of pre-primed unstretched canvas to the wall, similar to the way you would hang wallpaper, using an adhesive like Jade glue, Unibond, or wallpaper paste. However, don't attempt to glue up a finished painting on unstretched canvas, because it will be really difficult to get it to adhere correctly.
Okay now...Ready to paint?
Mural Techniques
To get started, you'll need to transfer your image onto the wall. By now you should have a sketch of what your mural will look like, so you'll need to enlarge the image into the wall using either one of these mural techniques: the grid method or an art projector. Use a pencil to trace the image onto your wall.
If you make a purchase via the links below I receive a small commission, which helps support this site.
Now that you have your pencil outline, you can start the underpainting. The underpainting consists of large blocks of color, over which you will paint more detail later. Depending on the colors in your image, you can use interior household paint for large areas of color (blue skies, green fields, etc), or you can mix your artist-quality acrylic paints with a Liquitex Ultra Matte Gel or Matte Gel Medium by using a 1:1 ratio.
From here on out, most mural techniques are similar to the painting techniques that you would use when painting with acrylics on canvas. Here are some of the many different mural techniques at your disposal:
Sponging
Sponging is a good way to create the sense of texture in a mural, such as clouds in the sky or leaves on a tree. You can also sponge a color on top of another color to create more of a sense of depth and interest, rather than leaving an area as a flat, single block of color.
Sponging is also one of the handy mural techniques for quickly filling in large areas with color.
To sponge, first wet your sponge and squeeze out the excess water. Dip your damp sponge lightly into your paint, then lightly blot the sponge on some paper towels. You don’t want your sponge to be too loaded with paint, or it will ruin the effect.
Stippling
Stippling is one of the popular mural techniques for creating detail without worrying about smooth blending. For instance, if you're painting a green field, you can bring it to life by stippling other colors into the green. Here's how to do it:
Apply a green underpainting, then after it is dry, paint a thin coat of a different color over top of it (for example, a yellow-green or a darker green).
While the paint is still wet, dab the wet paint with a dry stippling brush and dab the new color around until the new layer is all stippled. If done correctly, the new color will no longer looked "brushed on" and some of the underpainting will show through. You can repeat this mural technique as many times as you need (with as many colors as you want) until your desired area is covered.
This is a nice mural technique for creating the illusion of a field alive with shades of green, dappled in yellow sunlight.
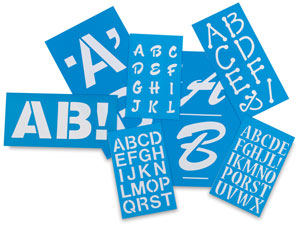
Stenciling
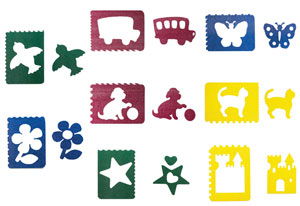
Stenciling is a popular mural technique because it is fairly simple and anyone can do it – you don't need any special art skills. You can buy stencils in a wide variety of shapes and sizes, from alphabet letters to farm animals to wildlife, trees, planets, you name it!
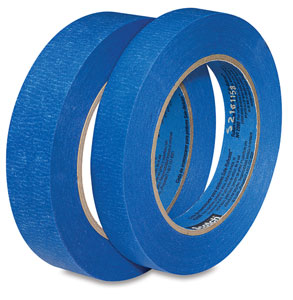
To stencil, use a painter's tape to adhere the stencil to the wall. With one hand, hold the stencil in place and with your other hand, paint in the color. You need to be cautious around the edges, because you don't want too much paint build-up on the edges when you lift the stencil away. Use a sweeping, circular motion when applying paint near the edges to avoid build up.
You can also use a stencil as an outline, and paint in details later. For example, you can follow the mural technique described above to stencil the image of an alligator in a solid shade of green. Then remove the stencil and paint in details, such as eyes, teeth, and bumpy skin.
Antiquing
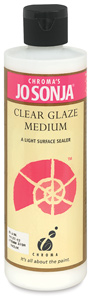
Do you want to make your mural look old, emanating a sense of history into the room? You can achieve this by antiquing, which is one of the easiest mural techniques. To antique a wall, mix your desired color (usually siena or umber to create an aged look) with an acrylic glazing medium, using the ratio of 4 to 5 parts glaze to 1 part paint. Brush the mixture onto your wall and quickly - while the paint is still wet - run a clean rag or cheesecloth over the paint to spread it around. For an added effect, you can use this technique to add even darker color to the corners and edges of the wall.
Glazing
To create acrylic glazes on a wall, mix the acrylic paint with an acrylic medium Golden Glazing Liquid. This will thin and "stretch" the paint, making it more translucent. When you paint a glaze on the wall, the color underneath will show through. This is a handy mural technique for adding dimension and shading to your mural.
The Recommended Products below are there to help you browse for art supplies, and if you make a purchase we get a small commission that supports this site and keeps it FREE! Thanks in advance.

How to finish and seal a painted wall mural
Congratulations! You've gotten this far – your mural is finished. Now you need to protect it to ensure that it stays vibrant and beautiful for a long time to come.
The final step to finishing your painted wall mural is to seal it. This means applying an isolation coat and a varnish. Use a clear, non-yellowing archival varnish in a matte or satin sheen. (Glossy varnish would be too reflective for a wall mural, and probably look weird under interior lighting conditions.) Choose a varnish that is removable, in case you need to get underneath the varnish for conservation purposes. (Who knows, they might take out your wall and put it in a museum someday!)
To apply the varnish, refer to the back of the bottle for the correct ratio of varnish to water. Start in a corner, using a wide paintbrush to brush on the varnish, going in a cross-hatching manner (little x's) across the wall. This varnish mural technique will help the varnish look more even. Voila! Your fabulous wall mural is complete!
For more information, Golden has a section on their website that explains how you should use their products on murals.
Mural Painting Tips
Follow these mural painting tips to ensure a smooth mural painting process!
Make sure kids, dogs, and other creatures of curiosity steer well clear of the mural while the paints or varnish are still wet.
Use an acrylic matte medium or glazing liquid to thin your paints. This is very important! When painting on canvas at an easel, you are more likely to use water to thin your paints – but if you are painting on a wall, there is more chance that the watery paint will trickle down the wall and streak paint on whatever you've already painted. So be sure to use an acrylic medium instead of water, although you can use a bit of water to help keep your brush moist and to keep your paints from drying out.
At every step of the way, take a moment to step back and look at your mural from a distance. It is important to keep in touch with the bigger picture. By stepping back regularly, you can immediately tell if something is wonky, and correct it. It is important that the mural looks good from up-close and also from far away, so constantly check to make sure that it looks good from all possible angles and distances.
Mural Painting Video Lessons
If you'd like more information about mural painting techniques, check out these easy video lessons from Skillshare! They offer a 14-day free trial and you get access to hundreds of other courses! I've been a paying subscriber to Skillshare for about 3 years, so I highly recommend it as a great way to learn new skills from a variety of experienced artists! If you sign up with them via these links I get a commission that helps support this site.