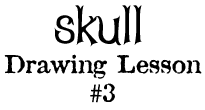
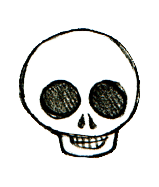
How to Draw Skulls
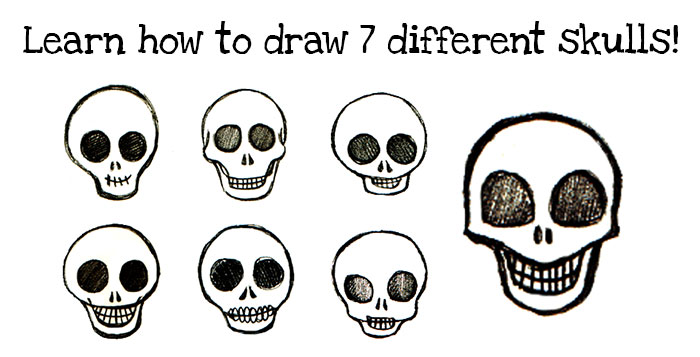

Learn how to draw skulls in this fun, easy drawing lesson!
All you need is a pencil and paper. You can also use a pen, marker, crayons, or any other drawing materials you may have.
In this drawing lesson, you'll learn how to draw the basic features of 7 different funky skulls. If you choose, you can then color and decorate your skull drawings for the Day of the Dead (Día de Muertos)!
These were all done in pencil and are the basic outline for the fancy, intensely-decorated skulls that I create for Día de Muertos. Check out my Day of the Dead art to see how I decorate these skulls with patterns and colors to create skull drawings that are fun and lively! Now, let's draw some skulls!
If you're interested in learning to draw, check out my review of the Let's Draw Course! It'll teach you the foundations of drawing and sketching from the comfort of your own home!


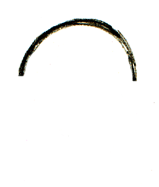
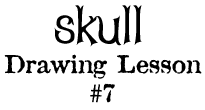
Draw the upper half of a half-circle.

Continue drawing the lines, as if you were about to draw a circle. Leave an opening at the bottom.

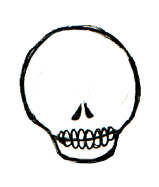
Connect the 2 ends by drawing a wide u-shaped line.

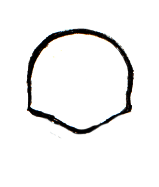
Draw 2 nostrils in the middle, lower half of the skull.
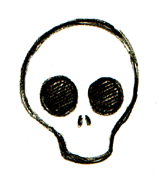
Draw 2 wide circles for the eyes.

Add a line for the mouth and several smaller lines for teeth.

Step 1

Draw the upper half of a half-circle.
Step 2

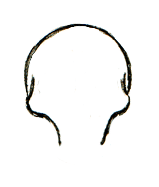
Add 2 lines, 1 inside each side of the circle. Start the lines inside the circle and gently curve them outside the circle.
Step 3

Continuing on these 2 lines, draw 2 lines (1 on each side) bringing the angle of the lines down and slightly inwards. These lines will form the cheekbones of the skull.
Step 4
Finish rounding out the cheekbones by bringing the lines back in towards the center and then down.
Step 5

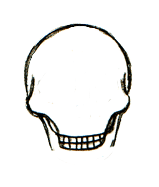
Connect the two sides with one gently sweeping straight line. This will be the bottom of the teeth!
Step 6
Underneath the cheekbones, draw a broad u-shaped line that connects one cheekbone to the other, crossing over the lines you drew in Step 4. This will form the top of the teeth.
Step 7

In between the lines you drew in Steps 6 and 7, draw another parallel line. This line will be the middle of the teeth.
Step 8
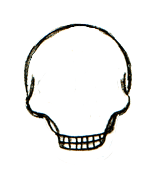
Draw several lines that go up and down to form the teeth. Now your skull is smiling!
Step 9
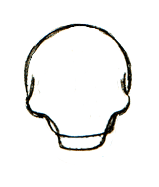
Under the cheekbones, next to the lines you drew in Step 6, draw 2 lines (1 on each side) going downwards and slanting inwards.
Step 10
Connect these 2 lines with a gently curved u-shaped line. Now your skull has a jaw! Almost done!
Step 11

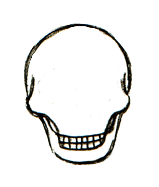
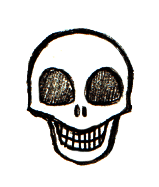
Above the teeth, draw 2 nostrils in between the cheekbones.
Step 12

Above the nostrils, draw 2 eyes. Now you have completed your skull drawing!
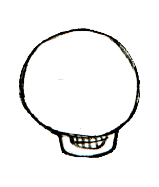
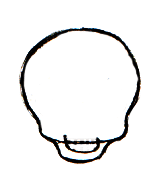
Step 1

Draw a circle that is rather flat along the bottom - almost looking "squashed".
Step 2

At the bottom of the circle, start inside of the circle on one side and draw a graceful u-shape that dips down and comes back up inside the circle on the other side. This will be the outline for the teeth.
Step 3

In between the bottom of the circle and the line you just drew in Step 2, draw a parallel line. This will be the middle of the teeth.
Step 4

Draw lines up and down for the teeth.
Step 5

Next to the mouth, draw 2 lines (1 on each side) that run parallel to the mouth.
Step 6
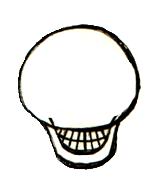
Draw a line connecting the 2 lines you just drew in Step 5. This line should run parallel to the mouth to form the jaw.
Step 7

Above the teeth, draw 2 raindrop shapes for nostrils.
Step 8

Draw 2 eyes. Now you're done!
Animation

Check out this animation to see all the steps to create this cute smiling skull.

Step 1

Draw a circle. It can be a perfectly round circle, or a slightly squashed circle, like the one above.
Step 2

Attached to the bottom of the circle, add 2 short lines (1 on each side).
Step 3

Connect the 2 lines you drew in Step 2 with a gently curving line that runs parallel to the bottom of the circle. This is the skull's jaw!
Step 4

Inside the area you just drew, draw a broad u-shape. This will be the mouth!
Step 5
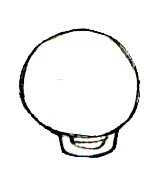
Inside the mouth, draw a horizontal line in the middle for the teeth.
Step 6
Draw vertical lines to make teeth!
Step 7

Above the teeth, draw 2 raindrop shapes for nostrils.
Step 8
Draw two large eyes. Voila, you've drawn a skull!
Animation

Watch this animation if you get stuck along the way.

Step 1
Start drawing a circle, but leave a wide opening at the bottom.
Step 2

On both sides of the open circle, draw a line that slopes gently downwards.
Step 3

Connect the 2 lines that you drew in Step 2. This forms the jawline of the skull.
Step 4

Above the line you drew in Step 3, draw a parallel line above it. This will be the middle of the teeth.
Step 5

On top of the line you drew in Step 4, draw a series of upside-down u-shapes to form the top row of teeth.
Step 6

On the other side of that line, draw a series of u-shapes to form the bottom row of teeth.
Step 7
Above the row of teeth, draw 2 raindrop shapes for nostrils.
Step 8

Draw 2 large eyes. You're done! Easy, eh?
Animation

Here is a helpful animation that shows the order of all the step to create this skull.

Skull Drawing Lesson 6
Step 1

Draw the arc of a circle, but leave a wide opening at the bottom.
Step 2

Add 2 short vertical lines, 1 on either end of the line you drew in Step 1.
Step 3

Connect these 2 lines with a single horizontal line.
Step 4

Underneath the line you drew in Step 3, draw a wide u-shape. This is the jaw of the skull.
Step 5
Draw a smaller wide u-shape that intersects the line you drew in Step 3. This is the bottom of the mouth.
Step 6

Draw a horizontal line that connects both ends of the u-shape that you drew in Step 5. This is the outline of the mouth!
Step 7

Inside the mouth, draw a bunch of short vertical lines to make teeth.
Step 8

Above the teeth, draw 2 raindrop shapes for nostrils.
Step 9

Draw 2 large circular shapes for eyes. Congrats, you just drew a skull!
Step 1

Draw an upside-down u-shape.
Step 2
On each side, draw a line from each edge that slants downwards and connects in the middle.
Step 3

Beneath the line you drew in Step 2, draw a u-shape. This will be the jaw of the skull.
Step 4
Inside the line you drew in Step 3, draw a similar line that runs parallel to it. This forms the outline of the mouth.
Step 5

Above the line you drew in Step 4, draw a parallel line to form the middle of the teeth.
Step 6

Draw a bunch of vertical lines to create the skull's teeth. Now it's smiling!
Step 7

Above the teeth, draw 2 nostrils.
Step 8
Draw 2 large circular shapes for eyes. Now you've drawn an evil skull!
Animation

Watch this animation so that you understand how each step adds up to create this evil skull drawing!
Day of the Dead Sugar Skulls
If you like drawing skulls, and you want to get more advanced, check out my gallery of Day of the Dead skulls. They are colorful, detailed and fun!

Day of the Dead Coloring Books
All three books are unique, so you won't find any overlapping art amongst them! My Sugar Skull Coloring Pages are digital, which means they can be downloaded instantly and printed from home! My Sugar Skulls Coloring Book and Day of the Dead Coloring Book are published books available online (via the links below) and in brick-and-mortar stores.
As an Amazon Associate I earn from qualifying purchases.

Sugar Skull Coloring Pages
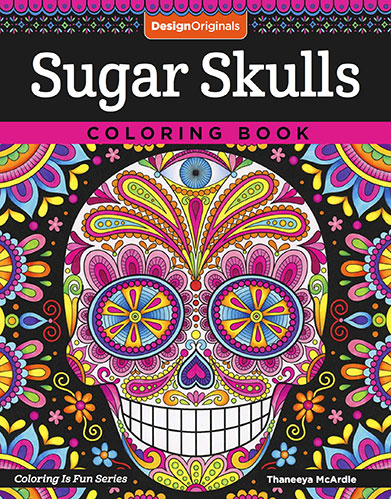
Sugar Skulls Coloring Book
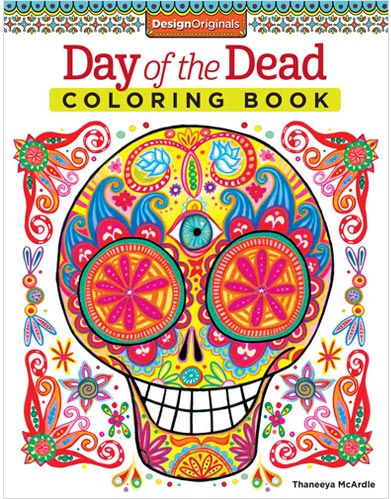
Day of the Dead Coloring Book
Make your own sugar skulls
Learn how to make your own real-life sugar skulls, like the sugar skulls I made below!
How to make small sugar skulls
How to make large sugar skulls
How to decorate sugar skulls

Keep learning!
Drawing Tutorials
Coloring Tutorials
Painting Tutorials
Guide to Buying Art Supplies
Coloring
If you’re a fan of coloring, be sure to check out my coloring books and printables, which are full of whimsical designs begging to be filled with color!


