Making Sugar Skulls
How to Make Life-Size Sugar Skulls
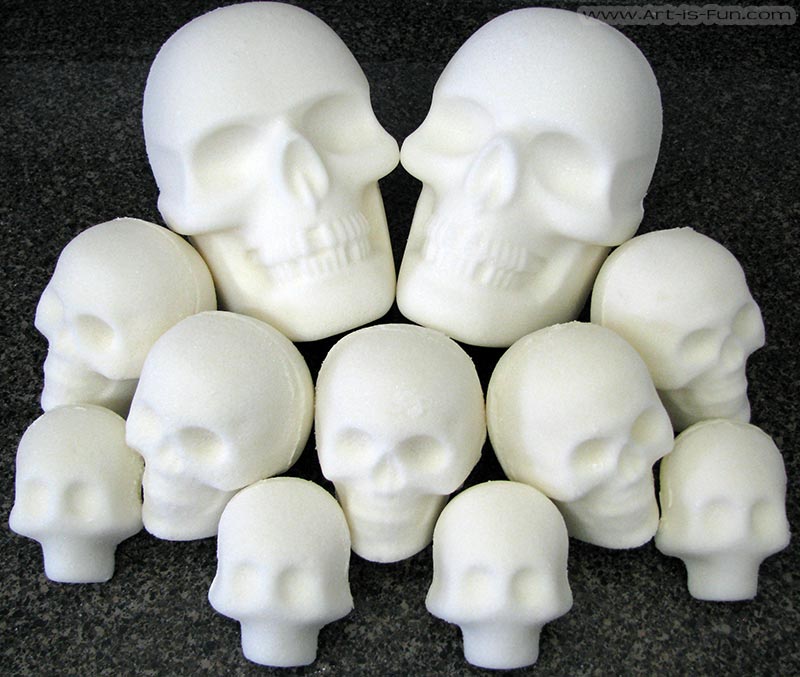
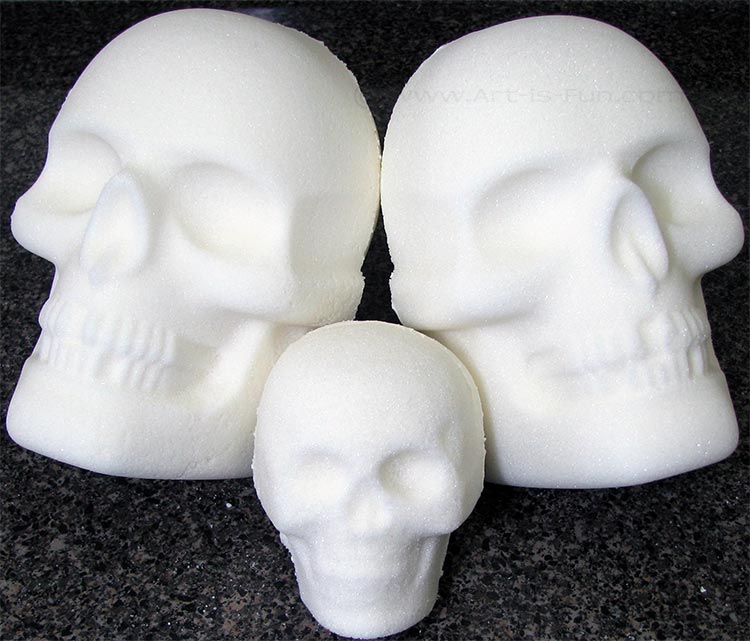
Two life-size skulls surrounded by medium and large sugar skulls.
Sugar skulls are made in Mexico in the weeks leading up to the Day of the Dead (called Día de Muertos in Mexico), and are given as colorful gifts or as offerings to the dearly departed during this special celebration in which we honor our loved ones who have passed away. In recent times, sugar skulls have come to be one of the most recognizable symbols of the Day of the Dead, with people all over the world making sugar skulls and adding their own personal creative twist to this meaningful tradition.

Sugar skulls are traditionally made using melted sugar, but this tutorial uses a simple, safe recipe that anyone can use. Sugar skulls are usually much smaller, but when I came across a huge 3D skull pan, I couldn't wait to try making life-size sugar skulls!
Note: It appears that the Wilton Nonstick 3D Skull Pan that I used to create these sugar skulls might now be discontinued, but this Nordic Ware Haunted Skull Pan (affiliate link) looks really similar and should work just fine. These molds were designed for Halloween-themed cakes, but with a little improvization, they produce magnificent sugar skulls, like the 2 you see above.
If you'd like to make the smaller skulls, seen in the top photo, check out our How to Make Sugar Skulls page.
This page focuses on making sugar skulls only. For decorating tips, visit our How to Decorate Sugar Skulls page.
What you'll need
Wilton Nonstick 3D Skull Pan (Or Nordic Ware Haunted Skull Pan)
Fine Granulated Sugar
Powdered Sugar
Meringue Powder
Water
Aluminum foil (or something similar)
Large sheet of cardboard or solid cutting board (anything flat that can hold the sugar skull when it comes out of the mold).
Meringue Powder
As an Amazon Associate, I earn from qualifying purchases at no additional cost to you.
Meringue powder is made from dried egg whites and is very important (especially with a life-size sugar skull) in forming a hard, solid skull. Without it, your skull would be too fragile to handle. Most brands of meringue powder available in supermarkets aren't strong enough for sugar skulls.

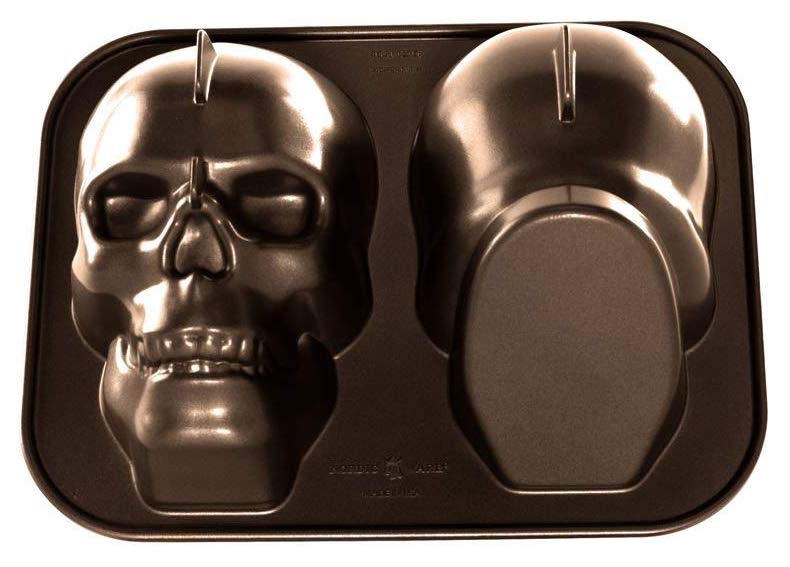
Wilton Nonstick 3D Skull Pan
The Wilton Nonstick 3D Skull Pan is designed for cake-making, but it's well-suited to making life-size sugar skulls. As you can see, it's large and sturdy.

As I noted earlier, it appears that the Wilton Nonstick 3D Skull Pan shown above is discontinued so if you can't find one I would suggest the Nordic Ware Haunted Skull Pan shown below, which appears to have similar dimensions and features as the pan I used.
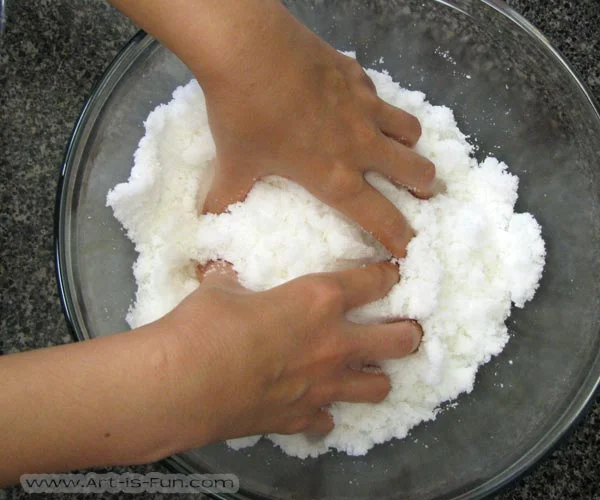
Step 1: Mixing
When making sugar skulls, the measurements are very simple: for every 1 cup of sugar, add 1 tsp of meringue powder and 1 tsp of water.
To make one life-size sugar skull you need 10 cups of sugar, 10 tsp of meringue powder, and 10 tsp of water. That's quite a lot of sugar, so if you don't have a huge mixing bowl, you may need to do several smaller batches.
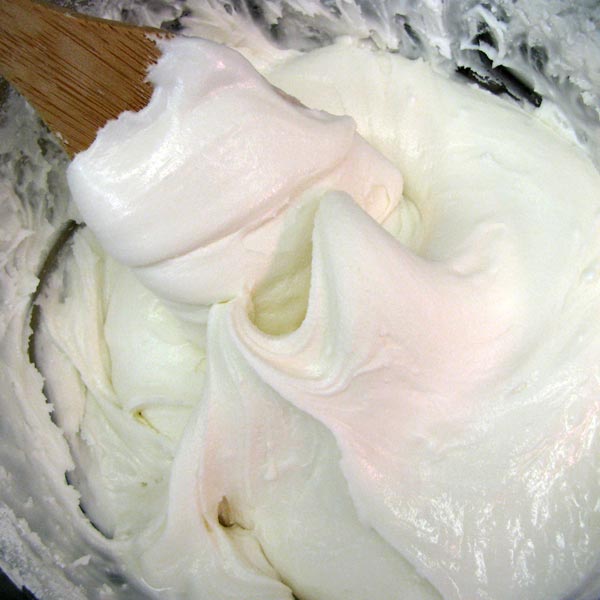
First, mix the sugar and meringue powder together and then add the water. Mix with your hands until all the sugar is moistened by the water. It takes a while and it feels like there isn't enough water. But you don't want it too moist because it will stick to the mold. It should feel like beach sand and be able to hold its shape when you squeeze a clump and make an indentation with your thumb. If it won't hold together it's too dry.

Step 2: Filling the Mold
The front and back parts of the mold are filled in differently.

The spacer in the centre must be removed before gluing
The Wilton Nonstick 3D Skull pan was designed for cake-making, which presents a problem. The back part of the mold was designed with a spacer on the back, which is supposed to be cut off after baking, before the two sides are glued together (see image on right).
It's easy to cut off this section when it's a cake, but not when it's a drying sugar skull, which can be hard on the outside, and soft in the center. Instead of cutting off the extra section, we're going to use aluminum foil to separate the main part from the section that is supposed to be cut off.
The front part of the mold (on the left side) can be filled in normally. Press the sugar into the mold as hard as you can and fill it to the top. The back part of the mold (on the right side) should only be filled in to the ridge.

Fill the front (left) mold to the top.

Fill the back (right) mold to the ridge.
Take some aluminum foil and lay it over top of the back part. Bend it to conform with the shape of the mold, so you know where to cut. Trim the foil with scissors so that it will fit in the mold.


Now it's time to fill up the rest of the mold, so that it won't collapse when you flip it over. Because this back part will just be removed after drying time, you don't need to worry about longevity. So just mix up 4 cups of sugar and 4 tsp of water (no meringue powder). Pack that tightly in the mold on top of the aluminum foil.
Note: the mold is quite heavy when full, so if you think you might struggle to lift it up and flip it over, you should fill and flip one side at a time (or find a strong person to do it for you).
Step 3: Scrape off excess sugar
Now that both sides of the mold are full, you need to scrape off any excess sugar so that the surface is flat and even.


Step 4: Flip over and remove the mold.
Place the chopping board (or whatever flat surface you're using) and, while holding it tightly in place, flip the mold over and carefully place it down. Now slowly lift off the mold to reveal your life-size sugar skull.


Step 5: Drying and Scooping
Let your skull dry for 5 to 6 hours, by which time the outside will be hard enough to handle, but the center will be soft enough to scoop out. Scooping out the center of both the front and back parts of the skull is important because it makes the skull lighter, helps it dry properly, and makes the two sides easier to glue together.
Important: Don't make sugar skulls when it's raining or humid because they won't dry properly. If you live in a humid climate like me, make your skulls in an air-conditioned environment.
First, remove the back part of the skull from the section you isolated with the aluminum foil.
Treat the parts with great care because they are still very fragile. Scoop out the middle, staying away from the neck, and leaving a 1 inch gap to the edge.
After you're done, give your skull another 6 hours to dry before moving onto steps 6 & 7.


Step 6: Preparing the Royal Icing
Royal icing dries really hard (no need for refrigeration) and acts as a strong adhesive. In addition to using it later as a decoration, you're going to use it to glue the front and back parts of the skull together.
The recipe consists of 1 pound of powdered sugar, 1/4 cup of meringue powder, and 1/3 cup of water. This will give you enough to glue at least 6 life-size skulls. Adjust the measurements if you're making fewer skulls.
Mix the ingredients together in a large bowl using an electric mixer or a wooden spoon or spatula (which takes more effort) for 5 to 10 minutes until the icing peaks. If your icing isn't thick enough the back part of the skull will keep sliding off the front part.

Making Sugar Skulls with Royal Icing
Step 7: Gluing the Sides Together
Now that your skull has dried for another 6 hours it's time to glue the front and back parts together.
Use a knife (or pastry bag) to apply the royal icing to the front skull only. Apply a good amount because any extra will be squeezed out the side and simply wiped off.
Now press the parts together to form a complete skull and run your finger along the edge to spread or remove any surplus icing. Don't worry if some icing gets stuck on the outside of the skull because it will be covered by the decorations.


You'll notice that the back part doesn't match the front to form a perfect skull. The back part helps create the illusion of a complete skull, but mostly acts as a stand that props up the front part of the skull for optimal display.
Now you're done making sugar skulls! Let's see how they look.
How Your Life-Size Sugar Skulls Will Look


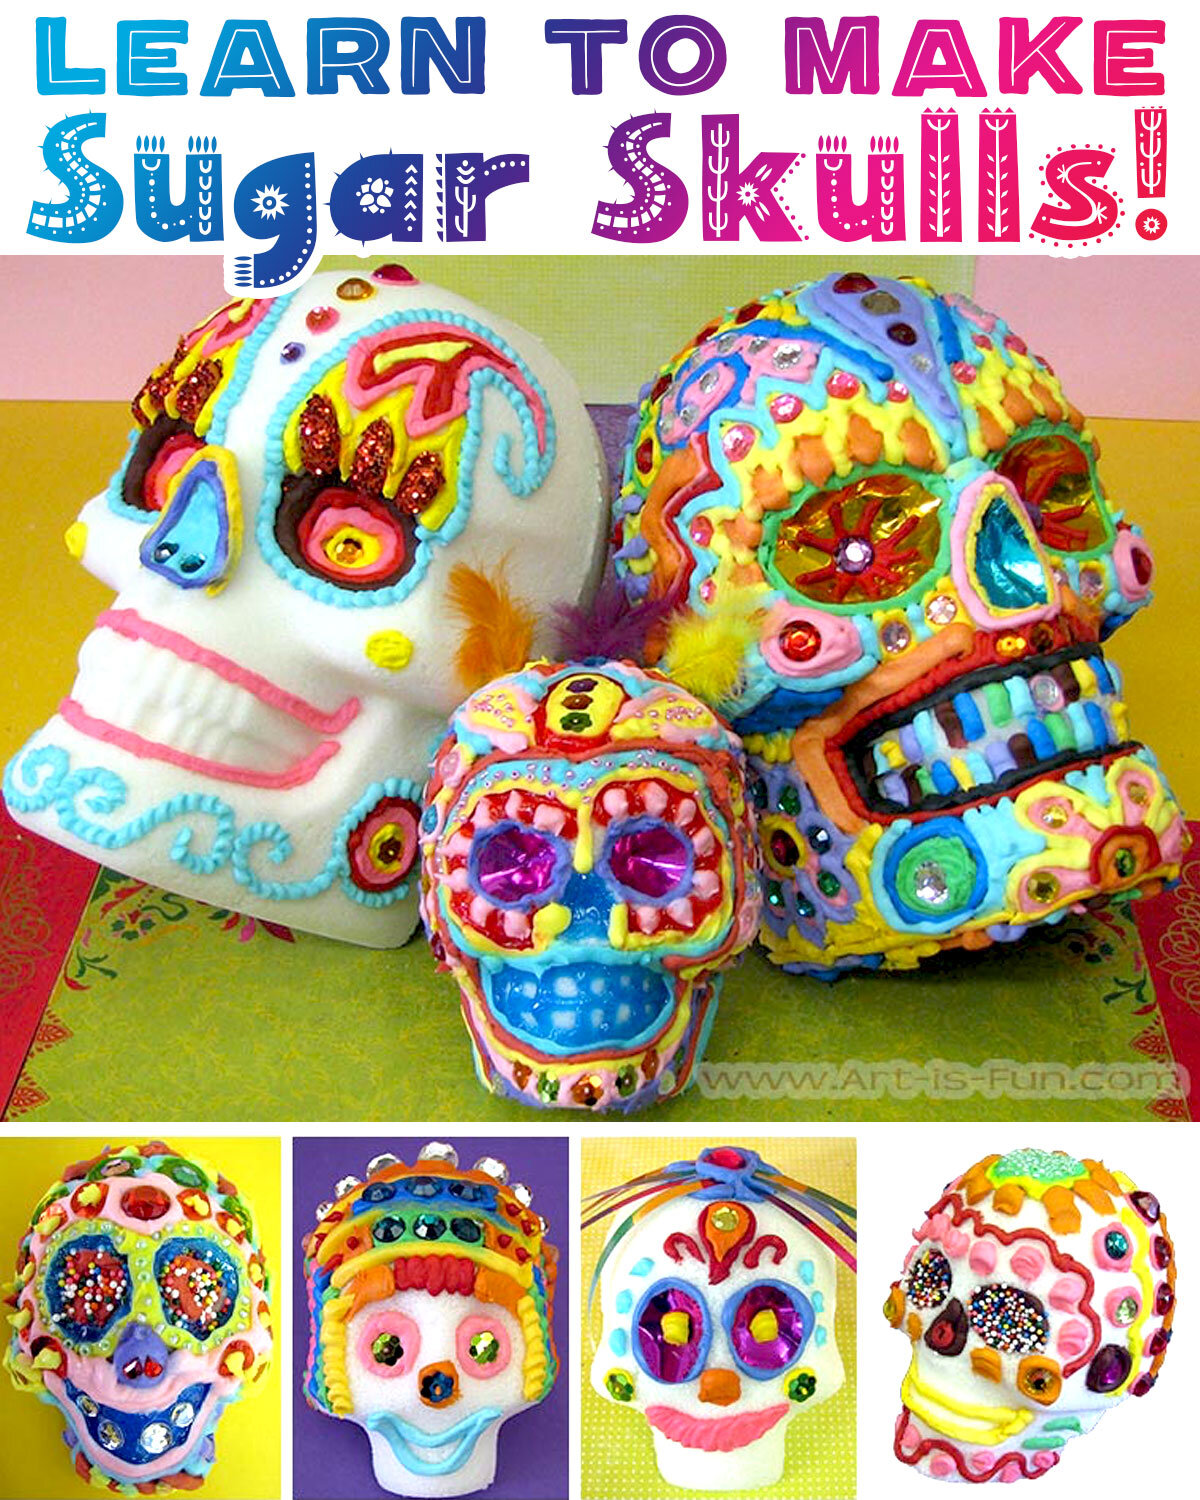
To Learn How to Turn These...
...Into Colorful Sugar Skulls...

...Check out our How to Decorate Sugar Skulls page!
If you like to color, I have a variety of Day of the Dead-themed options for you! My Sugar Skulls Coloring Book (below left) focuses entirely on sugar skulls, whereas my Day of the Dead Coloring Book (below middle), in addition to sugar skulls, features images inspired by other Day of the Dead imagery like papel picado, dancing skeletons, skulls in nichos and a waving Catrina. If you prefer printable coloring pages I also offer a downloadable PDF coloring book of detailed Sugar Skull Coloring Pages (below right)!
As an Amazon Associate I earn from qualifying purchases.
Sugar Skulls Coloring Book

Day of the Dead Coloring Book

Sugar Skull Coloring Pages


