Markers: a buying guide
In this guide to buying markers, I’ll explain everything you need to know so that you can confidently purchase the markers that will work best for your artistic needs! I’ll cover things like tip shape, blending, brands, costs and the important differences between water-based and alcohol-based markers. I’ll finish up with my recommendations for the best markers you can buy.
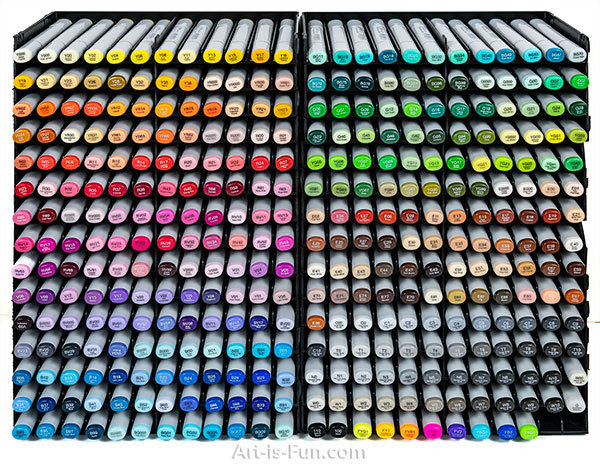
Since 2014, I’ve published over 30 coloring books (selling 4 million copies) and as a result, I’ve done a lot of a of illustrating and experimenting with markers - amassing a collection of 800+ markers from over a dozen different brands! You can see just a fraction of my collection in the pic below. In this Intro to Markers Guide I’ll pass on everything I’ve learned, so read on to find out which markers will be best for you!

If you don't have time to read all this and you just want to see my recommendations, you can jump straight to The Best Markers for art and illustration, or watch my video below!
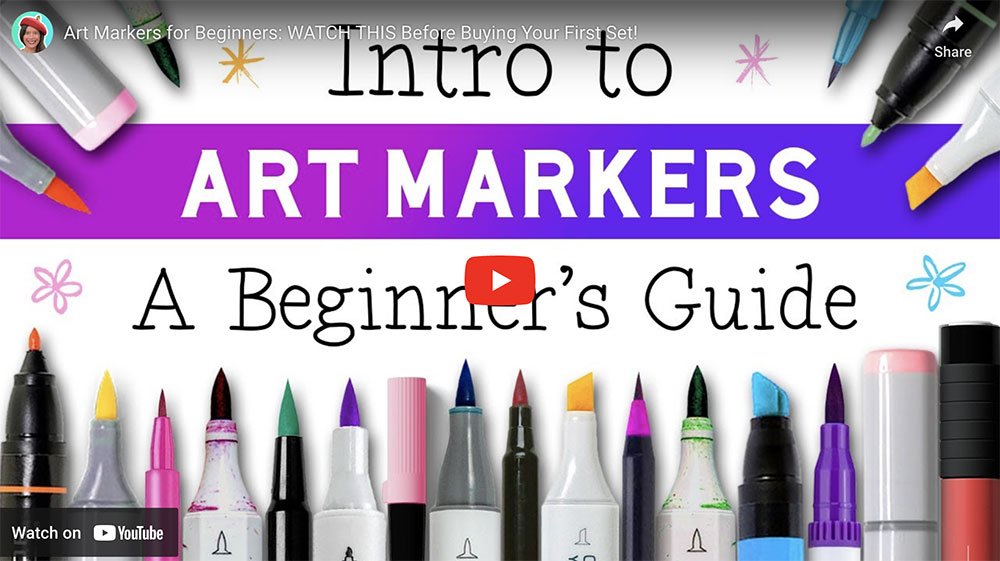
If you’re a total beginner to markers, check out my video above where I explain everything you need to know so that you can confidently purchase the markers that will work best for your artistic needs!
Subscribe to my channel to see more of my art videos! 😃
A quick overview
Not that long ago, markers were traditionally a niche tool used primarily by graphic designers and manga artists. Because markers are not as fade-resistant as other media, they were avoided by serious artists who had longevity in mind. But over time, as artists began to make art for the internet, more and more artists became attracted to the fantastic versatility of markers and their wide range of brilliant colors.
Markers are affordable, convenient, don’t make a mess, work well with other media and allow you to apply bold color quickly and easily! What’s not to love?!

All kinds of artists have found a use for markers. Because they’re easy to use and dry quickly, markers are great on-location or outdoors - perfect for travel, plein-air studies or urban sketching. Their effortless application of color makes markers well-suited to doodling, sketching and gesture-drawing. Markers can also blend smoothly, making them capable of photorealism, abstraction, and everything in between!
Markers have also experienced a huge surge in interest these past few years thanks to the adult coloring trend. Colorists love the wide range of color choice and the convenience of different tip shapes. This demand has triggered an explosion in the number of marker products on the market. This abundance of choice means that there’s a marker out there for every artist and price point. The hardest part is wading through all the different options to figure out which suits you best, but I’m here to help you with that!

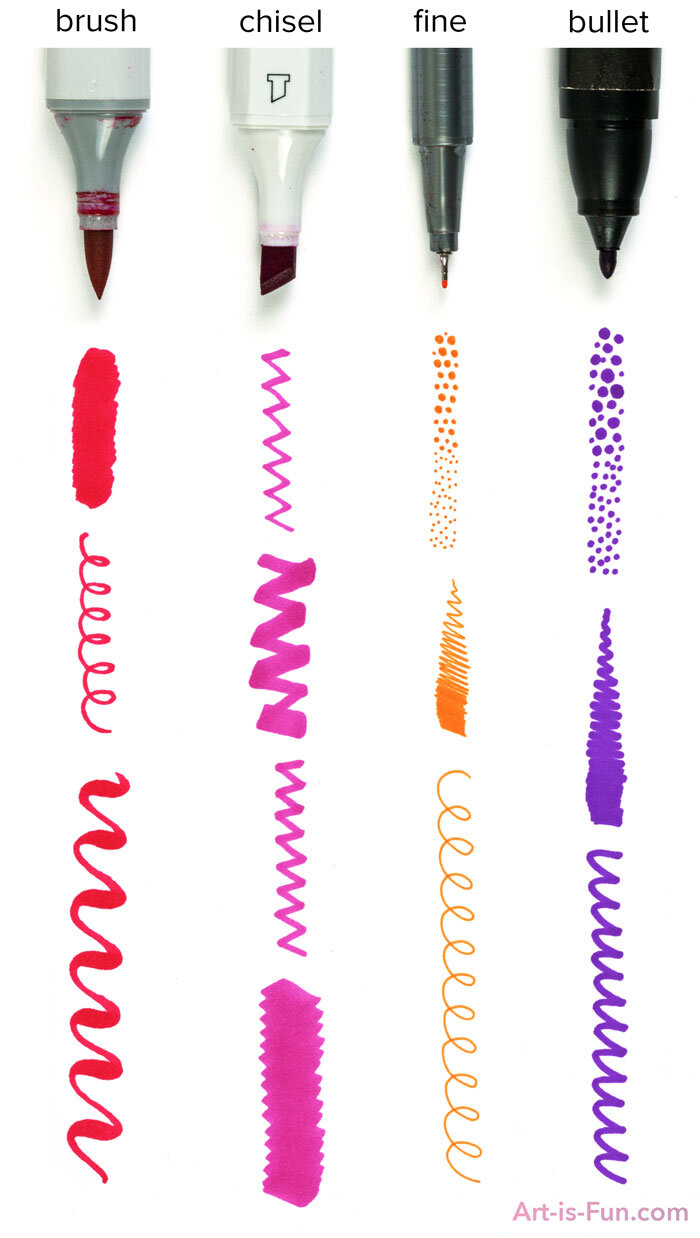
Tip Shapes
Before we dive deeply into the different brands, you’ll first need to decide what type of tip shape or nib you want, because the tip shape greatly impacts your experience of coloring. Here’s an overview of your options. Note that these terms are not standard across brands - for example, some manufacturers will use the phrase “fine tip” to refer to a tip that’s more similar to a bullet tip.
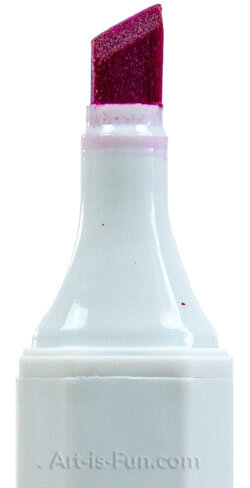
Brush Tip
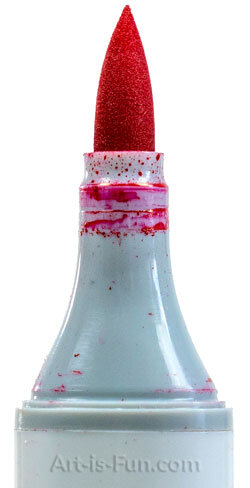
Brush tips (aka “brush pens”) are my absolute favorite because they’re the most versatile. The point can be used to create thin strokes (perfect for detailed work) and the brush can also be flattened to fill in large areas. You can also use the brush tip to create variable-width strokes. Brush pens are typically more expensive than other types, but for some brands the tips can be replaced when they become worn.
Chisel Tip
The chisel tip is very common across brands. It’s useful because you can use different edges for different purposes. The wide, flat side is great for laying down lots of color, while the pointy side is good for thinner strokes (but not as thin or precise as you can achieve with brush or fine tip markers). To be honest I rarely use the chisel tips on my markers, but that’s just me - your needs and style may be different!
Fine Tip
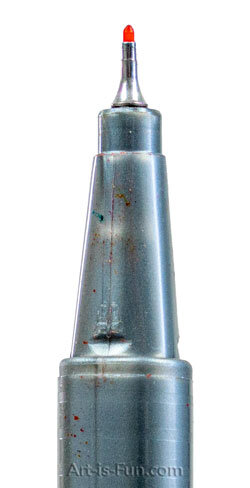
This is just like what you’d find on a technical pen that architects use. These tips are fantastic for fine details and patterning, but very impractical for larger blocks of color.
Bullet Tip
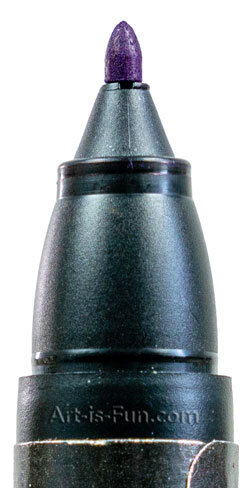
The trusty bullet tip is common in lots of cheaper marker sets. It’s a good generalist tip, but isn’t very versatile, in that super-fine details can be tricky and filling in large areas with color can be slow and tedious.
Double-Ended Markers

Double-ended markers are a perfect way to enjoy the best of both worlds! They feature a central ink reservoir with tips on either end. It’s common for high quality alcohol-based markers to be double-ended, most commonly with a brush tip and chisel tip at either end, although some have a bullet tip (instead of a brush tip) with a chisel tip at the other end.
Stroke Examples
As you can see in the image below, you can achieve a variety of strokes with any marker tip, which is pretty cool! However, each tip type has its strengths and weaknesses, so the best marker tip for you ultimately boils down to personal preference and the type of art you wish to create.
I often use the Copic marker brush tip to create entire artworks, but the cool thing about markers is that they can be combined, so you don’t need to do an entire artwork with the same tip or brand. Mix and match as you see fit. For instance, you can lay down large blocks of color with a brush tip or chisel tip, and then add details on top with a fine or bullet tip!
Water-based markers vs. Alcohol-based markers
The next biggest choice you’ll have to make is whether you want to buy water-based markers or alcohol-based markers.
Markers contain dyes that are suspended in either water or alcohol, which dries and leaves the color behind. This difference - whether the dye is suspended in water versus alcohol - can affect everything from cost to blend-ability and permanence. Here’s a quick rundown of how the two types differ:
Water-based markers
Cheaper
Fewer colors
Usually disposable
Poor fade resistance
Dries less quickly
No odor
Widely available
Can warp paper
Can be re-activated with water, creating washes.
Alcohol-based markers
More expensive
More colors
Some are refillable
Better fade resistance (but not lightfast)
Dries quickly
Can have an odor
Found mostly in art supply stores
Can bleed through paper
Has transparency, so colors can be layered.
Light streaking from a water-based marker
Remember using Crayola markers when you were a kid? If so, then you’re already familiar with water-based markers. Water-based markers are widely available in cheap, student-grade sets designed for kids, made from lower-quality dyes designed to be easily washable from hands.
However, water-based markers aren’t just for kids - there’s a whole range of water-based markers out there that are specifically made for professional artists and avid hobbyists, which can make them just as good as alcohol-based markers, depending on your intended purpose. Artist-quality markers of both types (water-based and alcohol-based) will typically contain higher-quality dyes than their cheaper counterparts.
So which are better: water-based or alcohol-based markers?
Once you decide to take the leap from Crayolas to artist-grade markers, it can be hard to decide between water-based and alcohol-based markers, so I suggest that you might want to do what I did when I first started using artist-quality markers, and try them both. As helpful as it can be to read about markers online, it’s important to try them yourself to get a firsthand understanding of how they work, which which will help you decide which ones you prefer using. Thankfully both types of markers are available open stock (singles) or in small sets, so you can try some out without breaking the bank!
Here’s a little summary between these two options:
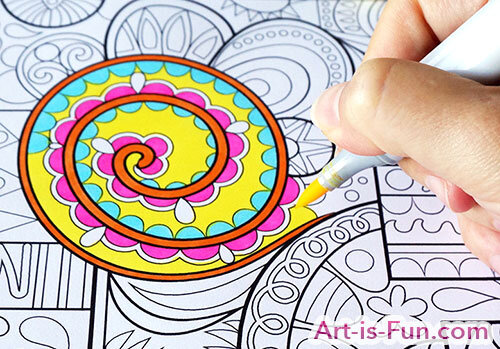
Learn how to use alcohol markers to color in this adorable cat!
Water-based markers are available everywhere, most commonly in those cheap sets designed for children, but you can also buy artist-quality water-based markers that are amazingly versatile. Because water-based markers don’t bleed through the paper as much, they’re well-suited for use in coloring books. The major downside is that if you lay down too much color, they can warp or damage the paper. Water-based markers are also extremely popular for hand-lettering.
Alcohol-based markers (sometimes called “permanent markers”) are typically the preferred choice of artists because they blend more smoothly and predictably (see below), and you can create shades, tints and ombrés by overlaying colors. They do tend to bleed through the paper, so double-sided coloring books are not ideal. For more info, check out Tips for Using Alcohol Markers in Coloring Books.
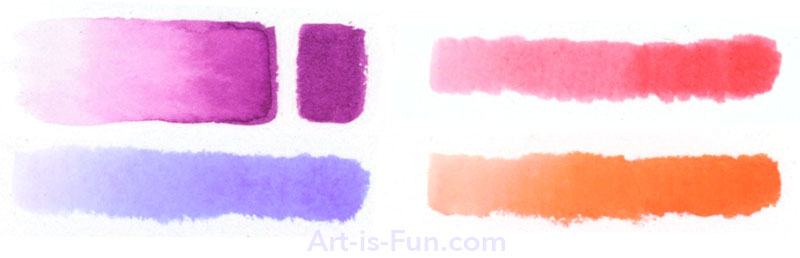
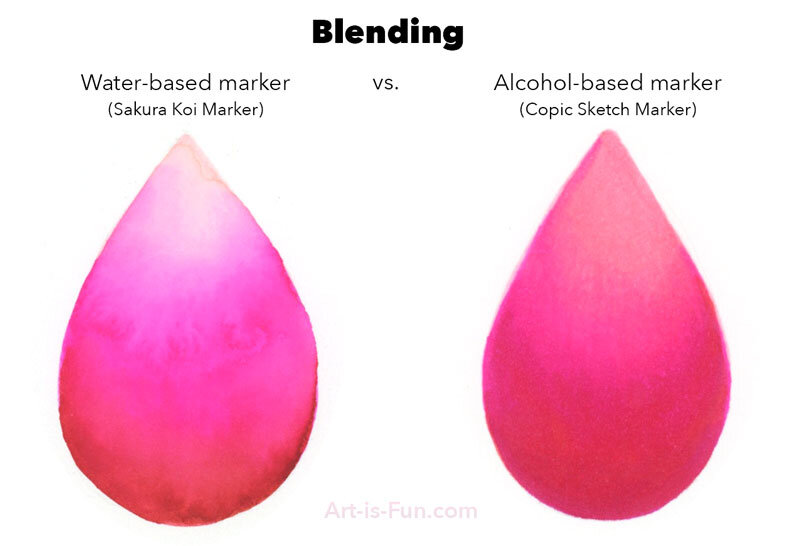
The image below is a comparison of how well water-based and alcohol-based markers lay down color. These are relatively large 3-inch circles on cardstock. As you can see, water-based markers can be streaky when the colors are overlapped to create a solid fill. While alcohol markers don’t appear as streaky, they can have some variations in saturation, with some areas appearing slightly lighter or darker than others. Whether you love or loathe these attributes depends on your personal style - for example, some people (like me) appreciate the subtle variations in alcohol markers because it lends the artwork a more natural, organic feel, whereas I get frustrated by the streakiness of water-based markers when trying to fill large spaces.
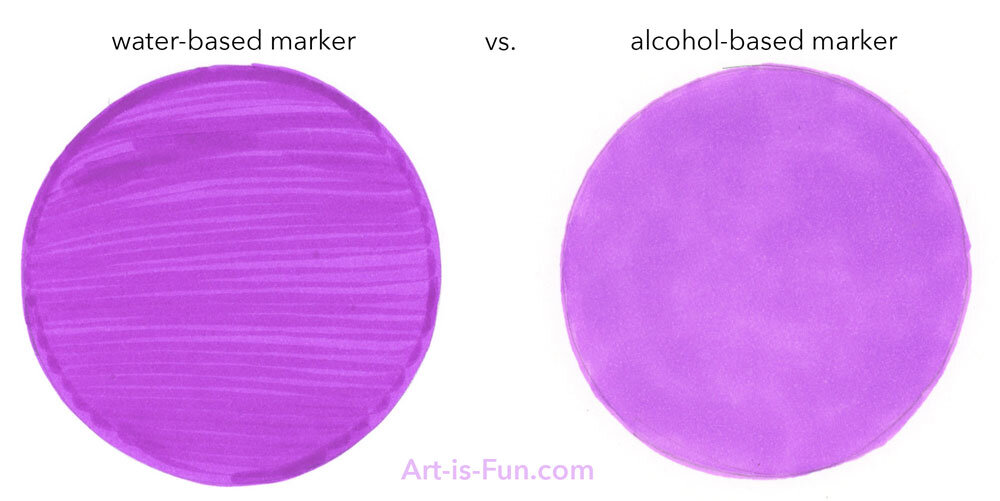
A comparison of how well water-based and alcohol-based markers lay down color on cardstock.
If you’re in a store and thinking of buying some markers but can’t figure out if they’re water- or alcohol-based, pop off the lid and gently smell (some can be pungent, so be cautious). If there’s a strong odor, they are alcohol-based markers.
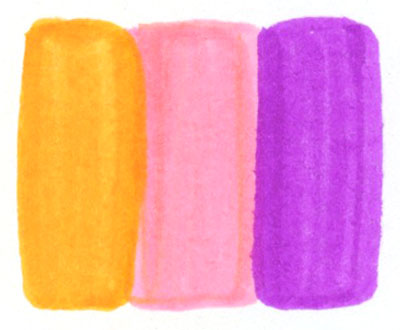
Color Range
My complete Copic Sketch Markers collection
Color range is important because it helps you achieve better tonal gradation with your blending. This is because you’re able to use a range of similar tones to blend one color into another, creating a nice smooth transition.
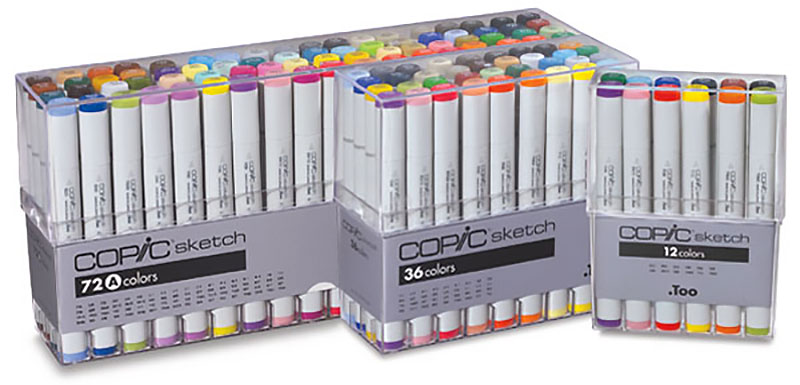
Alcohol-based markers offer the widest color range, and can often be purchased open stock (one at a time). Here’s my collection of the full range of Copic Sketch Markers, consisting of 358 colors! To be honest, however, I almost never need that many colors, so don’t feel like you absolutely need to get them all to make great art.
After you’ve bought markers, it’s a good idea to create a color chart to use as a reference. Here’s a template that the company Copic created for their markers. I use this as a handy reference whenever I’m making art with my Copics. Here’s my completed version:
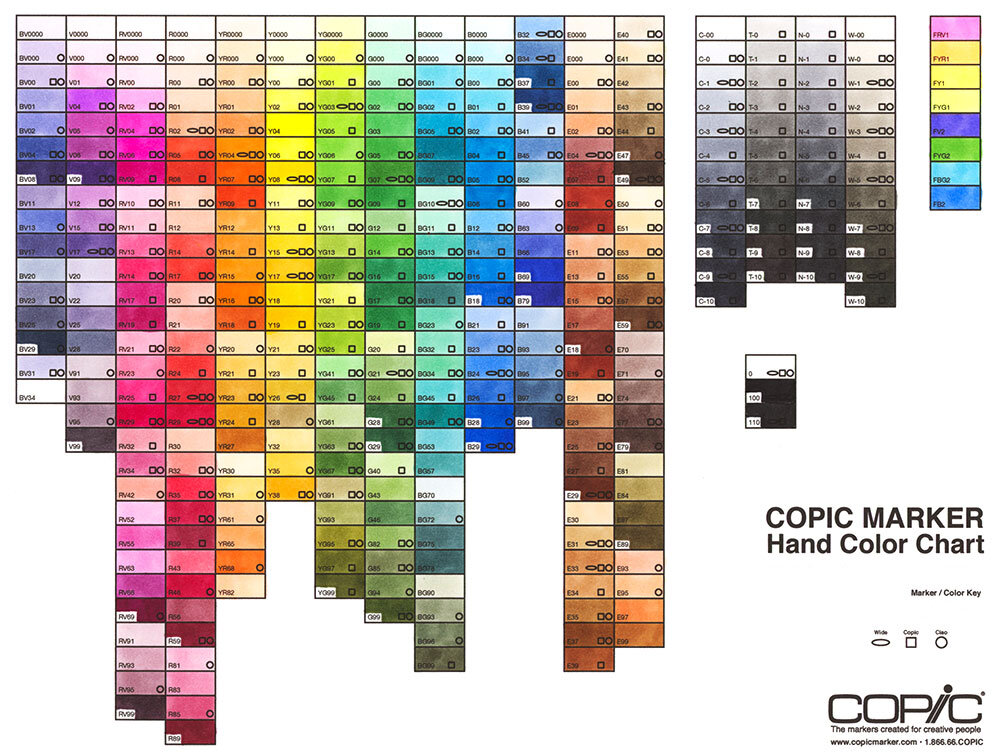
If you’d like to learn more about Copics, including the different products they offer, check out my extensive review of Copic Markers.
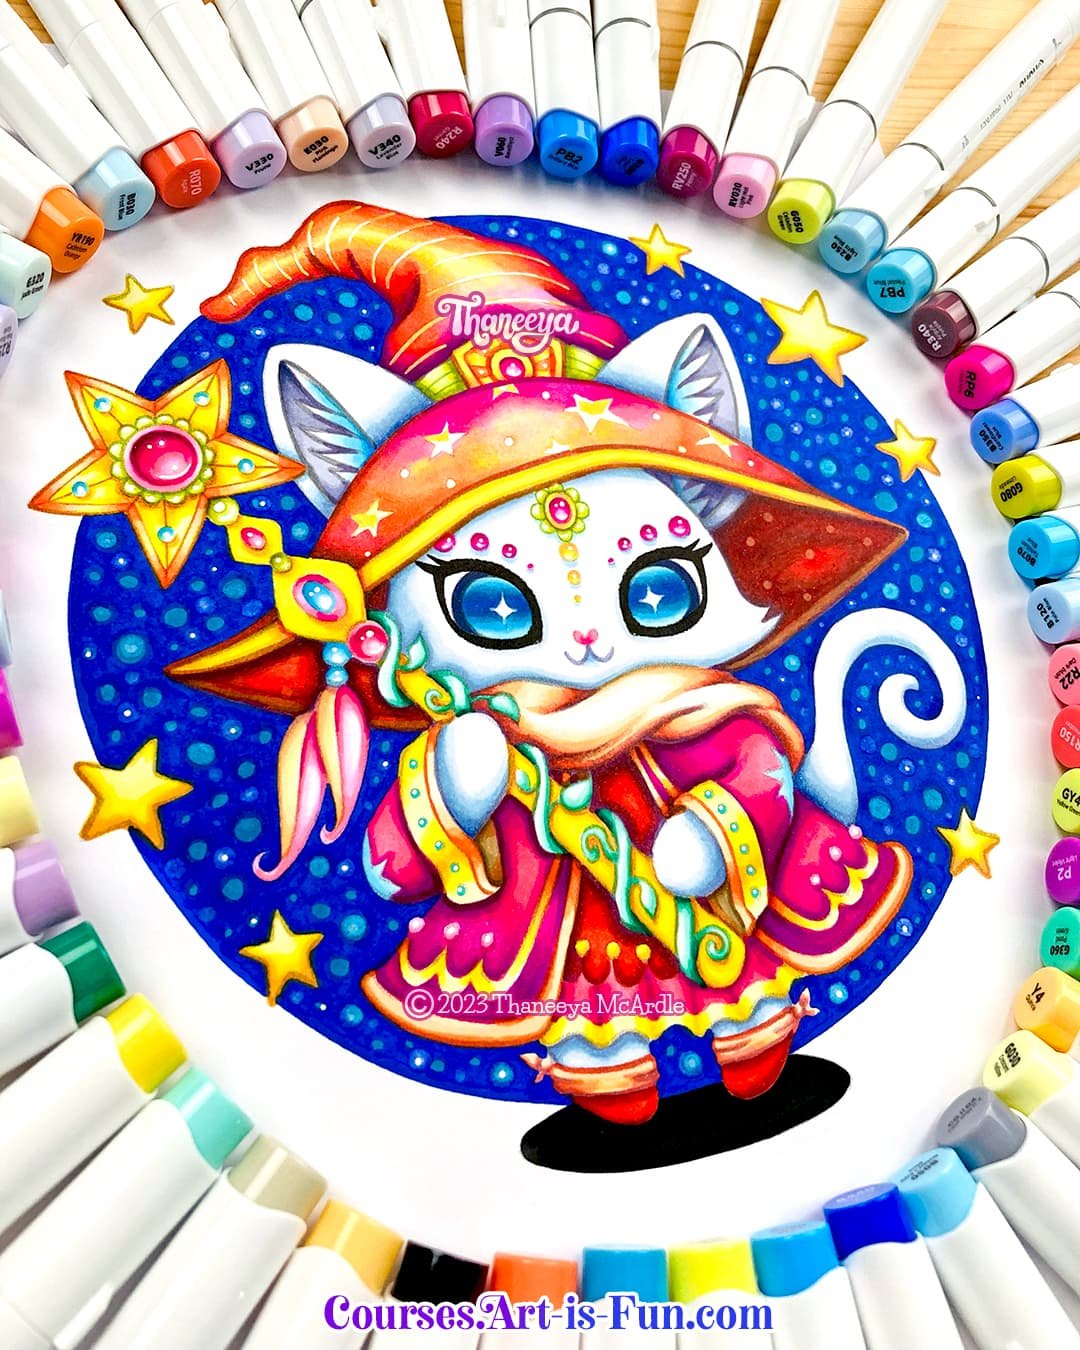
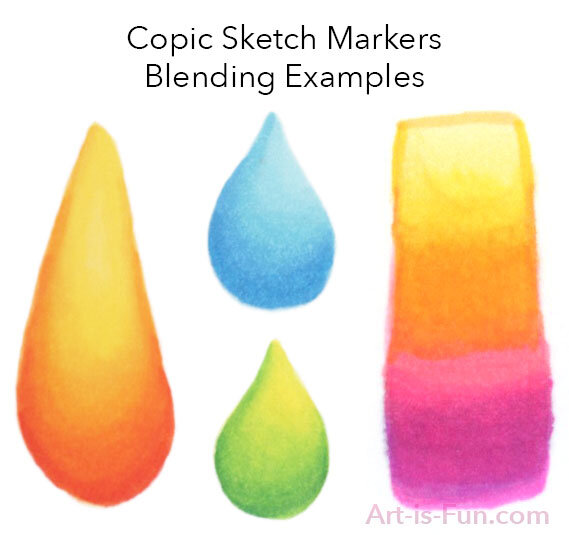
Blending
When making art, the ability to create smooth blends can make an artwork really come to life. The result can look so stunning and professional that you wouldn’t even think it was made with markers!
Here’s an example from my Holiday Cheer Coloring Book that I colored with Copic Sketch Markers. I employed blending in just about every element, especially to bring out the highlight on the hat!

Both water-based and alcohol-based markers are capable of blending, but each has its ups and downs. Note that blending performance is heavily reliant on the paper you’re using. For instance, I’ve found that alcohol-based markers blend fantastically on marker paper, but when I tested them on heavyweight multimedia paper it was difficult because the paper was too absorbent. I’m currently developing a separate article to test a range of markers on different types of paper - stay tuned!
Blending with water-based markers
Water-based markers can leave streaks when you’re blending, and create unwanted darker areas when you accidentally layer strokes.
Excessive blending can can also warp or damage paper, which is why you should use watercolor paper (because it’s tough) or marker paper, which is less absorbent, thereby allowing you more time to blend. (That said, water-based markers can tear or pill just about any type of paper, including watercolor paper and marker paper, depending on your technique.)
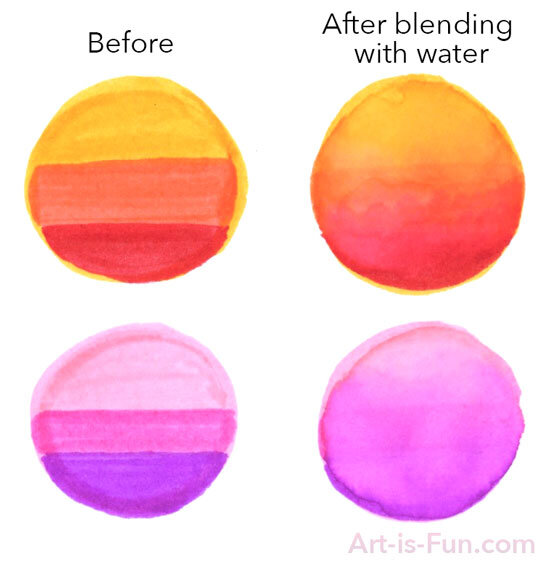
Water-based markers can be re-activated after they’ve dried, which allows you to lighten them with water or create washes (but the downside is you might accidentally ruin an area you’d already finished by getting it wet).
Blending with water-based markers can be more unpredictable than blending with alcohol markers because water can react with the dye in unexpected ways that can be difficult to control. While some may find this frustrating, it’s a trait that many watercolorists appreciate, so if you’ve got experience with watercolor paint, your skills will transfer well to blending with water-based markers.
You can also dip the tip of your marker in water to create a smooth transition in tone and saturation (from light to dark).
Creating washes with water-based markers
Blending with alcohol-based markers
Alcohol-based markers, on the other hand, blend more smoothly, but because they dry very quickly, you have to move fast. And once they’re dry, that’s it - the colors are very difficult to remove and any additional blending will darken or alter the existing colors. These qualities can make it difficult to smoothly cover large areas with alcohol-based markers or create large gradients (but it’s perfect for smaller areas).
Because alcohol markers are partially transparent, you can layer colors on top of one another to create different shades or tints.
Blending with alcohol markers is more predictable than blending with water-based markers, in that you know how the colors will interact so it’s pretty easy to replicate previous blends.
One downside with alcohol markers is that they can bleed through the paper. For this reason, I like to use my Copics on thick cardstock or marker paper. But if you’re planning to use them in coloring books (most of which have thin paper) you should put some scrap paper behind the page you’re coloring (or gently tear the page out and then color it on top of scrap paper) so that the dye can’t stain other pages.
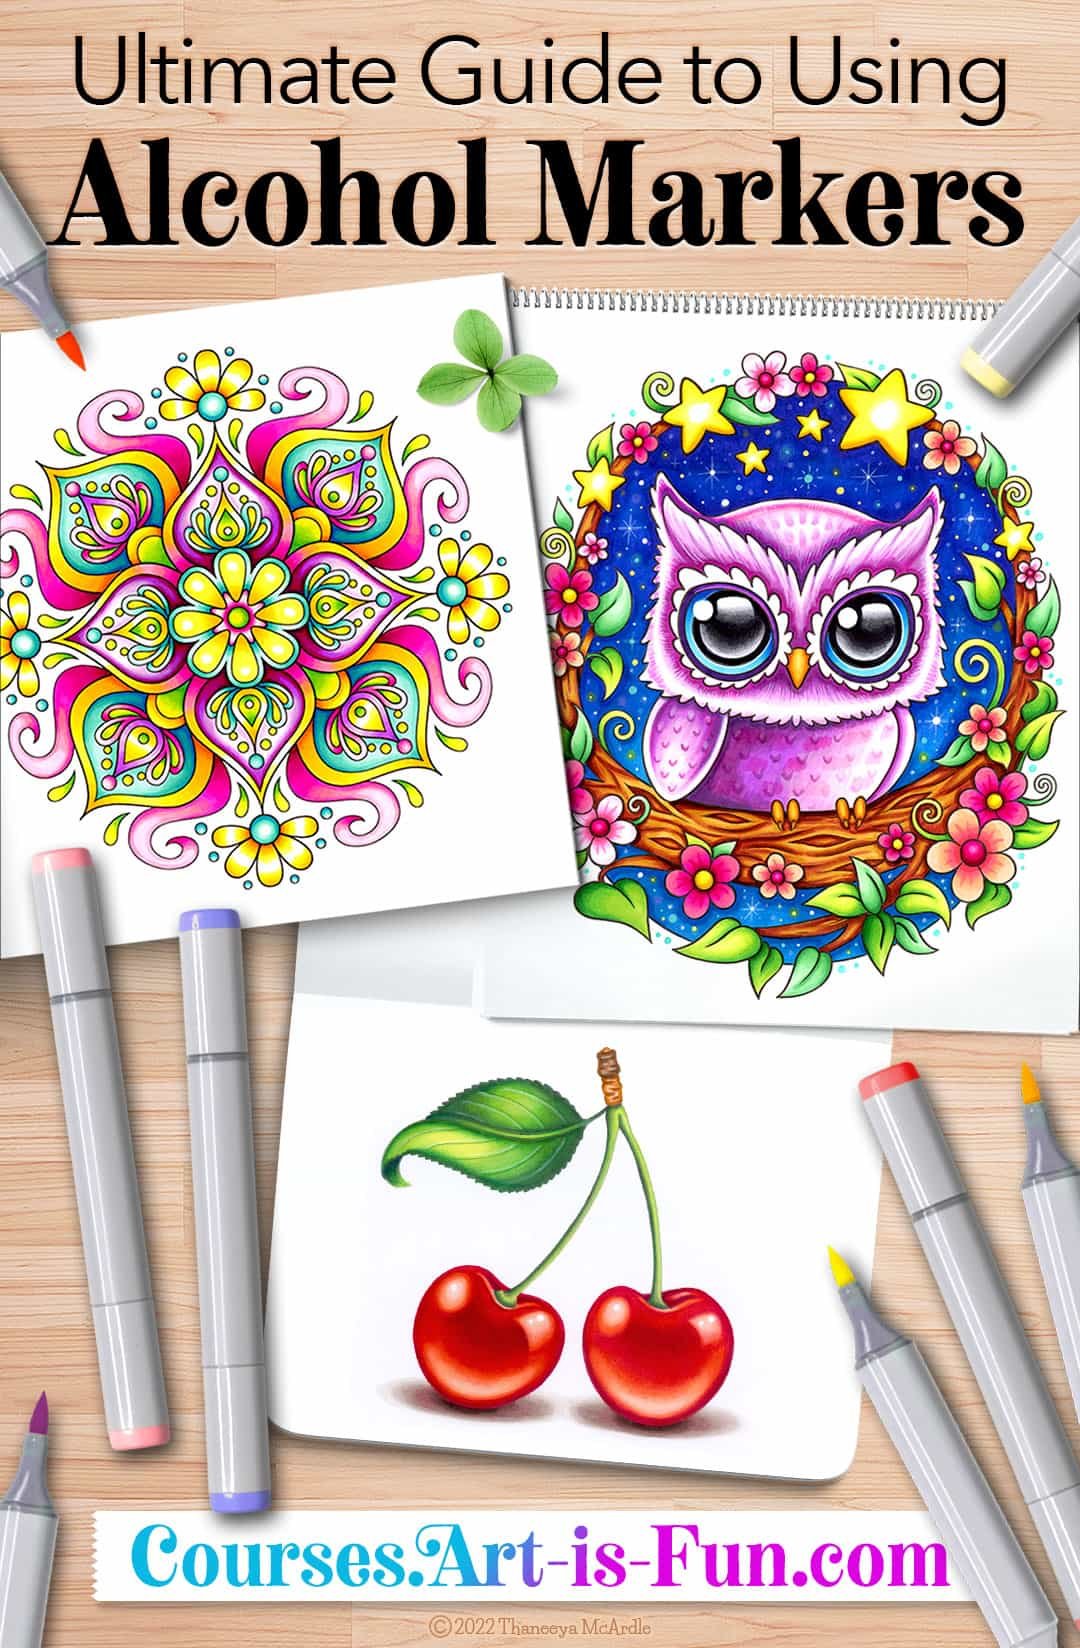
Ultimate Guide to Using Alcohol Markers
If you'd like to learn how to get the most out of your alcohol markers, check out my comprehensive video course: Ultimate Guide to Using Alcohol Markers. With 11+ hours of instructional video and 40+ pages of downloadable resources, this course is designed to take you from a beginner level to an advanced level!
A fantastic feature of all markers is that you can mix different marker types and brands, and even combine them with other media like colored pencils. If I’m not happy with how I’ve blended some colors or I’ve got some streaking, I go over the area with Prismacolor Colored Pencils to smooth out those imperfections.
In the image below (from my Hippie Animals Coloring Book), I used Copic Sketch Markers for the base layer, and then then used Prismacolor colored pencils to improve the shading, texture and details on the face and hair.

Colored with a base layer of alcohol markers and colored pencils on top
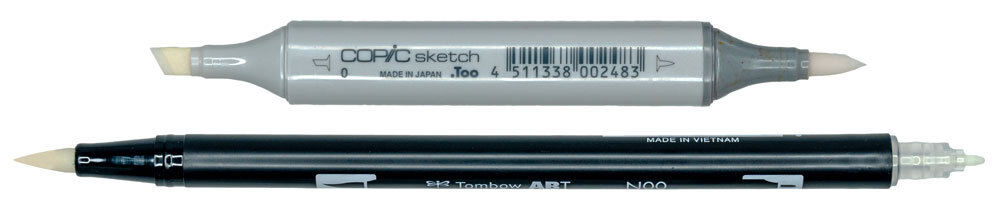
Some marker brands come with blenders, which are basically markers filled with solvent and no dye, so they’re “clear” and colorless. Despite the name, these tools aren’t really used for blending. Rather, they’re good for lightening areas of your artwork and adding highlights. They’re also useful for fixing mistakes and blending from color to white. Copic’s Colorless Blender can be used with alcohol-based markers and Tombow’s N00 Colorless Blender Pen can be used with water-based markers.
To learn more, check out my YouTube video, How to Use the Colorless Blender.
Copic and Tombow Colorless Blenders
If you’re interested in learning more about blending, check out this Skillshare course: Blending with Water Based Markers, available with their 14-day free trial (if you sign up I get a commission that helps support this site).
Tip: if the nib becomes dirty, just scribble on a blank scrap of paper until it’s clean. This works for both water-based and alcohol-based markers!
Lightfastness
All art media will fade over time as light, oxygen and humidity gradually break the chemical bonds of the molecules that produce the color. The ability to resist color fading is called lightfastness. If you’re creating artworks that you hope to preserve, it’s a good idea to find media classified as lightfast or archival, which can hold their color for decades. But beware, you can’t always trust these labels.
As I’ve already mentioned, markers get their color from dye, which is more susceptible to fading than the pigments you’d find in paint, pastels or pencils. For this reason, the vast majority of markers are not truly lightfast (for example, “permanent” markers will also fade).
As an Amazon Associate, I earn from qualifying purchases at no additional cost to you.
If you’re especially concerned about lightfastness, but still want the convenience of markers, check out Winsor & Newton Promarker Watercolor Markers, which contain pigment rather than dye. You could also consider Faber-Castell’s Pitt Artist Pens, which contain pigmented India ink that is more fade resistant than dye (but unlike other water-based markers, these pens are permanent and waterproof after they’re dry).
Bottom line: your marker art will fade more quickly than other media. To illustrate, here’s an example of an artwork I created 2.5 years ago using Copic Sketch Markers. The second image is after it spent 2.5 years on my fridge, being exposed to daily indirect light.
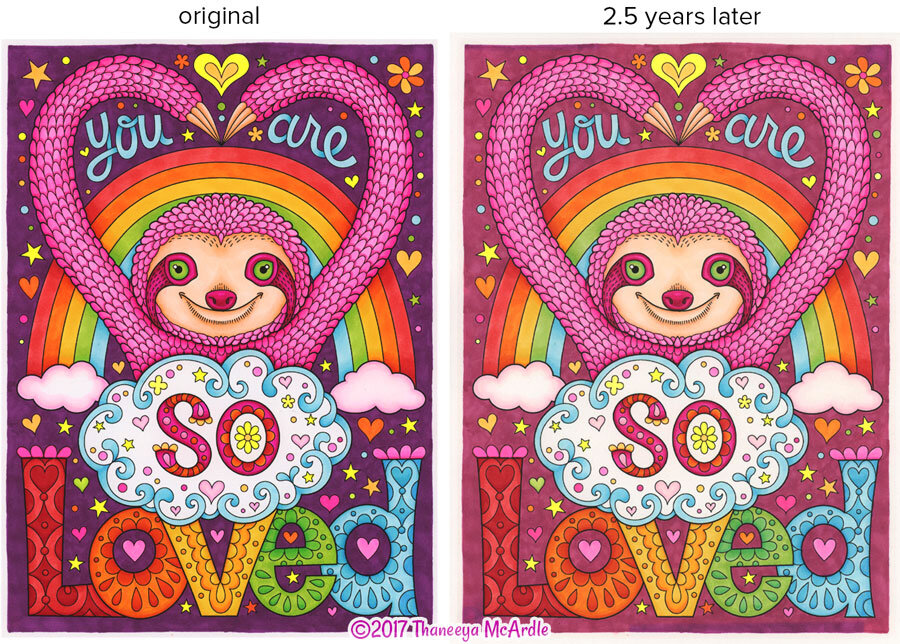
Note how much my markers faded over the course of 2.5 years on my fridge. Most colors look surprisingly good but that dark purple background really faded!
There are some steps you can take to slow color fading:
- Prioritize alcohol-based markers because they contain better quality dyes and are more lightfast.
- Store your marker art away from direct sunlight or framed under UV-filtering glass. I store my marker art in archival boxes, and even after a few years, there’s very little fading.
- You can also treat the finished artwork with a product like Krylon UV-Resistant Clear Acrylic Coating, but you must test it first because it can easily ruin an artwork. It’s important to wait several hours for the markers to set, because if you spray it too soon, the spray varnish can cause the colors to run. It can also darken your artwork or add a particular sheen that changes the look, so it’s best to test it out on some marker doodles to see what happens.
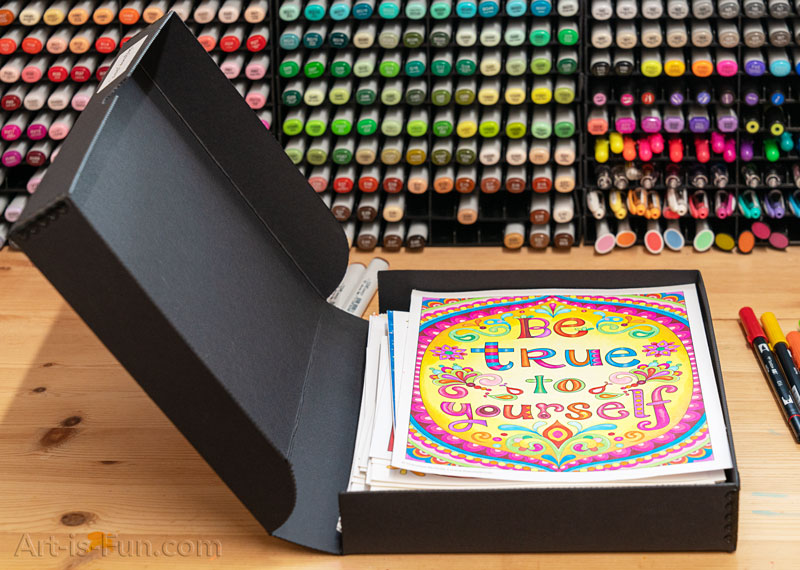
I protect my coloring pages in an archival box
Whether lightfastness is an issue for you depends on your workflow. These days, I create almost all of my art for the purpose of licensing and publishing rather than selling originals. As soon as I’ve finished a piece, I scan it at 600 DPI and then it’s preserved in my digital backup system. If you’re planning on displaying your work, you can create prints from your digital scans and it will look so similar to the original that no one will hardly know the difference (just be sure to market them as prints if you intend to sell them or display them publicly)!
Cost
Alcohol markers are typically more expensive than water-based markers. But for the price bump you get better quality dyes, smoother blending, more colors, and the cost-saving ability to refill your markers and replace damaged tips.
I’m not going to list prices here because they can vary widely from the list price, with Blick often offering steep discounts that can fluctuate. In general you can get Sharpies for about a dollar a piece or less, but for artist-quality alcohol markers, expect to pay between $3 to $7 per marker (less if you get a set).
Most water-based markers, on the other hand, cannot be refilled and the marker has to be thrown away when it runs dry or the tip becomes damaged. But if you’re on a budget, you can still pick up some artist quality markers for between $2 to $5 each.
The Best Markers
As an Amazon Associate, I earn from qualifying purchases at no additional cost to you.
The Best Alcohol-Based Markers
My overall pick are the Ohuhu Honolulu Markers. Thanks to their low price, they used to be my ultra-budget pick, but were lacking in certain areas. Since then, Ohuhu has made impressive strides in matching the features found in expensive markers, like Copics. They've boosted the color range (341 colors at the time of writing), made the markers refillable and the nibs replaceable. You can even buy them individually! If you're a complete beginner, I'd recommend getting a mid-range set, like the 120-set. If you're a completist who likes to own every color, you'll need to get the 320-set and the 36 Skin Tone set.
My only gripe with the Ohuhu is that their color naming system is confusing. To compensate for this, you can check out my Custom Ohuhu Color Chart, which arranges the colors chromatically! You can also read my in-depth review of Ohuhu alcohol brush markers to find out if they're right for you!

My ultra-budget pick are Arrtx Markers (shown below), which are a good choice if you prefer the bullet/fine tip over the brush tip that comes with the other products mentioned above. They manage to be even cheaper than the Ohuhu markers, but they aren't refillable and the tips aren't replaceable. However, I like that they come with a handy carrying case with an individual slot for each marker. Read my detailed review of Arrtx Markers to learn more! You can also check out my article on the Best Copic Alternatives.

If you want the very best, you still can't do better than Copic Sketch Markers. As I mentioned, I have the complete set of 358 colors and I have been using them to create colored art for my books for over a decade! They've been the best you can buy for years, and although brands like Ohuhu have significantly closed the gap, the Copics still have the best color range and the highest quality nibs. The only downside is their expensive price point, so they're really only worthwhile for professional artists and illustrators.
You can often save money by buying them in larger sets. I acquired all 358 colors gradually over the course of 1-2 years - there’s no need to rush and buy all of them at once (unless you can afford it and want to). I like that Copic Sketch Markers are double-ended, with the brush tip on one end and the chisel on the other. Read above to learn about how well they perform when it comes to coloring and blending. To learn more, check out my extensive review of Copic Markers.
The Best Water-Based Markers
As an Amazon Associate, I earn from qualifying purchases at no additional cost to you.
My overall pick are the Ohuhu Water-Based Markers, which are available in a set of 120 for only $35 (at the time of this writing!). You can also get a huge 160-set for around $45. These are by far the cheapest water-based markers I've found that are also good quality, which makes them an excellent set for beginners. However, like most water-based markers, these aren't refillable, don't have replaceable nibs, and can't be purchased individually.

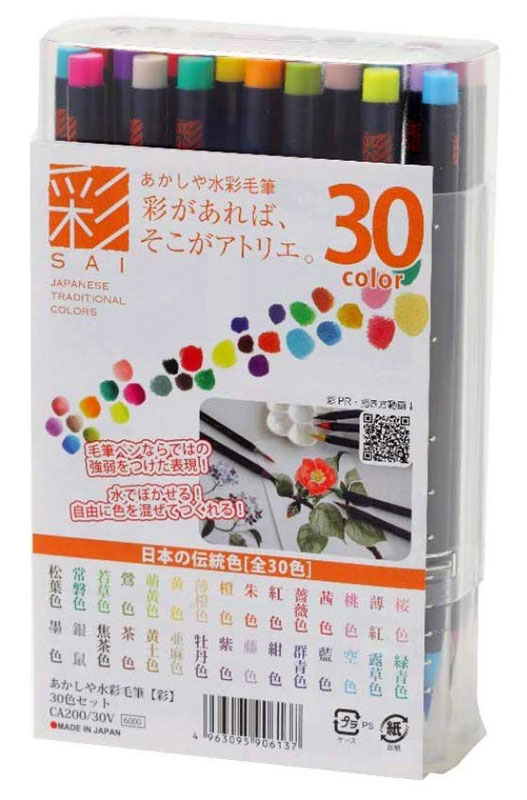
My upgrade pick are the Akashiya Sai Watercolor Brush Pens. They only have a color range of 30, but I just had to recommend them because they’re a joy to use and they’re not as expensive as some of the other brands. I got the set of 20 because they were on sale, and I immediately loved the flexibility and smoothness of their brush tip. The color glides off the nib and their blending capabilities are amazing for the price. As I write, the 20-color set is around $20-30 and the 30-color set is $45.
I also like the Tombow Dual Brush pens, which are available in an impressive 108 colors. The only downside for me with Tombow brush markers is that the brush tips are not as flexible as my other recommendations, and as a result, they can sometimes tear or pill the paper, which is an issue I haven't encountered with any of my other recommended water-based markers.
The Faber-Castell Pitt Artist Pens come from a reliable brand, and contain pigmented India ink (which is more lightfast), but I found that they didn’t blend as well as I would have liked. I can see why they’re popular with people who like hand-lettering though.
Another recommendation are Sakura Koi Coloring Brush Pens, which are available in 48 colors. I find that they're a little harder to blend than my other recommendations, but if you dampen the paper first, they'll blend more easily.
I hope this article was helpful! If you’re interested in more, check out my Guide to Buying Art Supplies.
Check out my Ultimate Guide to Using Alcohol Markers!
Once you’ve got your markers, you’ll want to learn how to make the most of them!
My Ultimate Guide to Using Alcohol Markers course is designed to take you from a complete beginner level to an advanced level. With 10+ lessons about blending techniques and blending theory, you’ll hone your skills with fun practice printables that are included in the course (so no drawing skills are necessary)!
Over the course of 65 video lessons, I also cover practical tips like how to maintain your markers, transfer your line art, fix mistakes, and so much more.
Then, you’ll learn step-by-step how to create the 3 advanced artworks that you see below!