How to Refill Copic Markers
One of the best things about Copic Markers is that they’re refillable, which means they’ll last for years! If you’ve wondered how to refill Copic markers, I’m going to show you the correct methods for both the new and old Copic ink refill bottles.
New vs. Old Copic Ink Refill Bottles
Before we get to the step-by-step instructions, I’ll quickly explain the differences between the two types of Copic ink refill bottles (affiliate link).
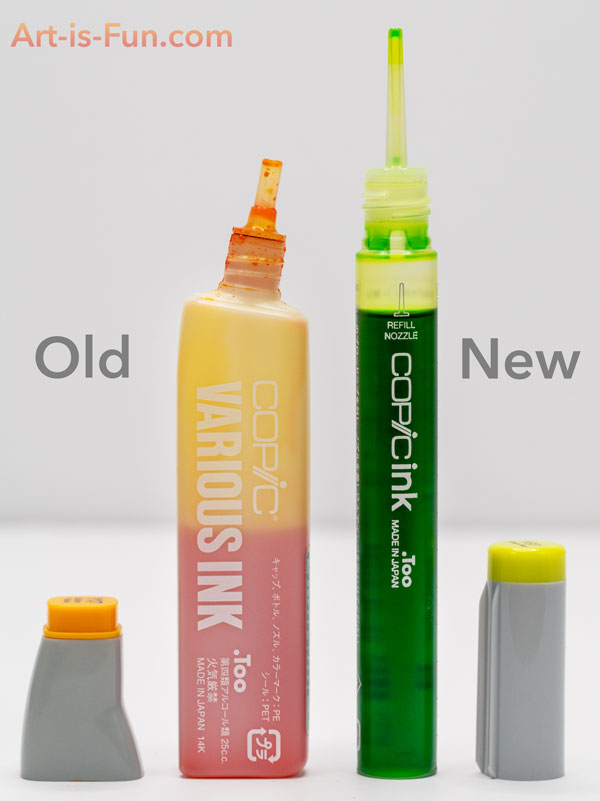
In July 2020 Copic released a newly designed refill bottle (called "Copic Ink"), after discontinuing the old bottle design (called "Copic Various Ink") back in June 2019.
The new pen-shaped bottle design features an elongated nozzle that can be inserted into the marker (after the nib has been removed), which offers more control and prevents spillage. The pen-shape design allows for easier storage and also allows you to apply ink directly onto your artwork (as seen on this YouTube video that Copic produced).
The new bottles are smaller than the old ones (12ml vs 25ml), and cheaper (around $5-6). This might actually suit some artists who found that the old bottles were too large and struggled to use up all the ink.
The new bottles can fill a Sketch marker 7 times, a Ciao marker 9 times, and a Classic/Original marker 5 times. That’s certainly a lot more efficient than having to buy a new marker every time it runs out of ink!
Just like the previous model, the new ink refill bottles are available in all 358 colors, and you have the option of buying empty bottles if you want to mix your own colors.
How to refill a marker using Copic Ink (new design)

The new bottles are designed to prevent spillage, but to be on the safe side you might want to protect your workspace with some scrap paper or newspaper, at least until you’re used to the process.
Uncap both ends of the marker. This just helps equalize the pressure within the marker barrel.
Take some tweezers and gently remove the chisel/broad nib. Never remove the brush nib (unless you're replacing it with a new one) because it's made from several pieces of felt and may come apart. Copic has their own brand of tweezers designed specifically for this task, but any tweezers you own should do the job just fine (see the comparison image below).
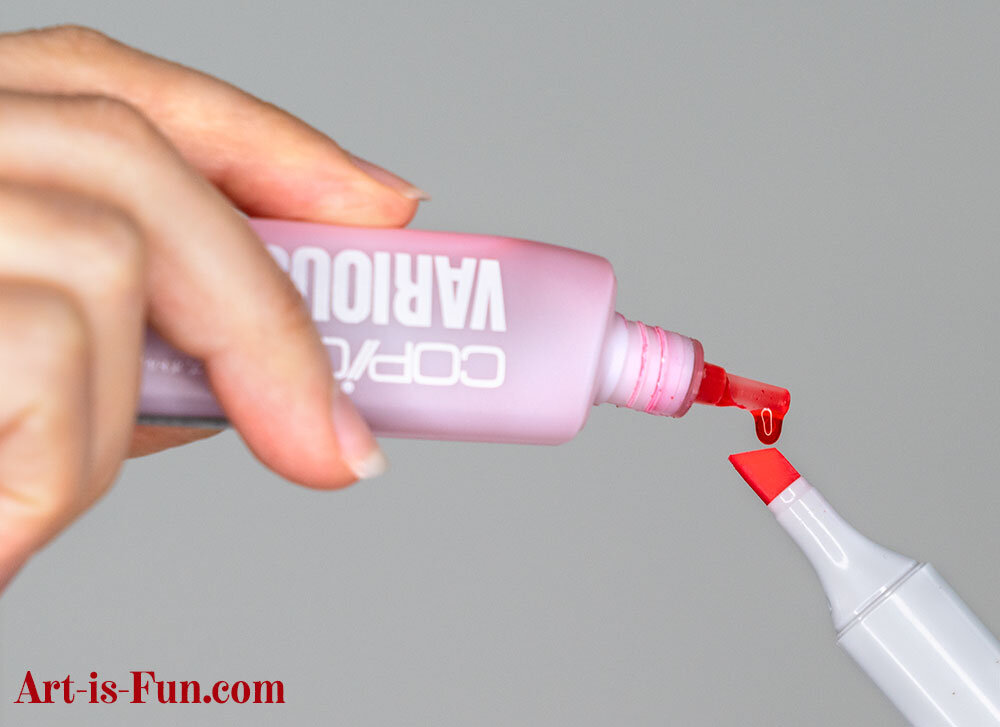
Uncap the refill ink pen and insert it into the marker. The nozzle won't easily release ink until you squeeze, but be gentle so that you don't squirt too much out by mistake.
Squeeze the ink bottle to slowly fill the marker. Because the marker is opaque, you can't see how much ink is in the barrel. This is where the measurement tick marks on the bottle come in handy. As you can see in the close-up image below, each line represents 1 milliliter (ml). If you know the marker is empty (because the nib is dry), use the markings on the refill pen to add 1.8ml for Sketch, 1.4ml for Ciao, and 2.5ml for Classic/Original. If the marker isn't completely empty, but you want to top it up, just add 1ml because you don't want to risk overfilling it, which can cause leakage. To judge the amount accurately, make sure you’re holding the bottle vertically.
Now you just need to use your tweezers to gently re-insert the nib back into the marker, and you're done!

Copic tweezers vs. regular tweezers

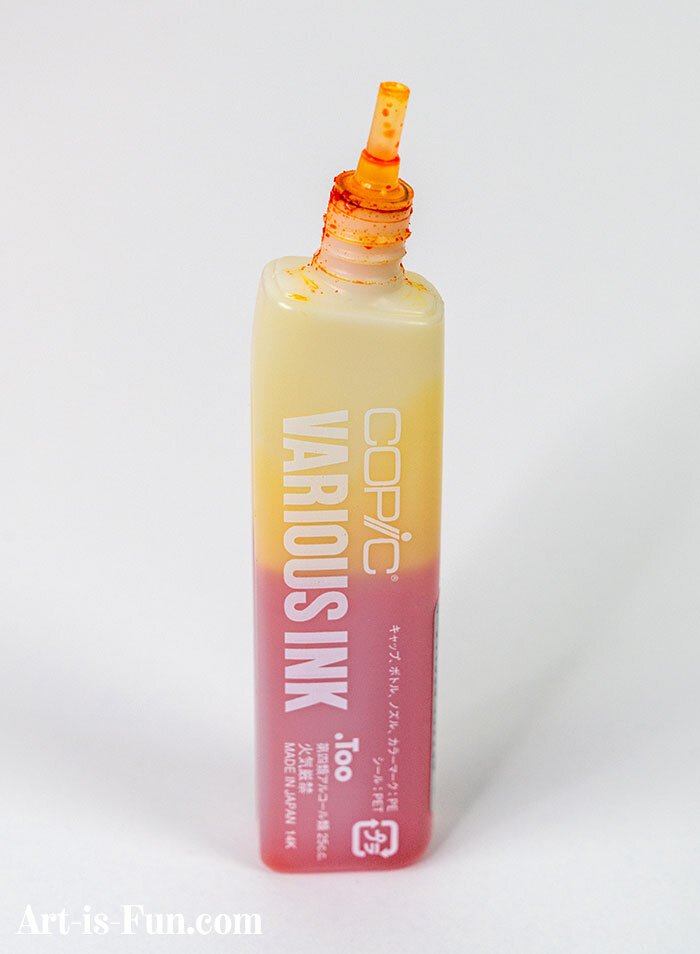
Copic refill bottle measurements
Free Copic Markers Course
If you'd like to learn how get the most out of your alcohol markers, check out this Free Copic Markers course! With over 90 minutes of instructional video, I demonstrate how to blend Copic Markers to create a luminescent butterfly.
How to refill using Copic Various Ink (old design)
As you’ll see below, the old design isn’t quite as user friendly because the nozzle is shorter. For this reason, Copic’s recommended method for the old bottle was the drip method, which is slower, but has the advantage of leaving the nib in place.
The drip method using the old design

Protect your workspace. Occasionally you might spill some ink, so always make sure you refill your Copic over a trash bin or lay down some scrap paper or old newspaper. Copic inks are made of dye and they leave a stain that can be very hard to remove – I have a few ink splotches on my wooden art desk that can attest to that!
Uncap both ends of the marker. This just helps equalize the pressure within the marker barrel.
Uncap the refill bottle. Be sure to handle it carefully and only turn it upside-down when you’re ready to drop some ink onto your marker.
Tilt the marker at a 45 degree angle and gently squeeze the refill bottle to apply ink one drop at a time onto the chisel/broad nib. The end of the refill bottle is designed to dispense drops, and the nib happily soaks up the ink. See the above GIF for a demo!
I generally apply about 20 drops of ink, but it can take 30 or more to fully fill the marker.
If ink starts dripping out the other end of the marker, you know it’s full, but I never fill mine that much. I prefer not to make a mess, so I usually under-fill my markers, giving them quick top-ups when needed.
If you accidentally make a mess – for example if you drop too much ink onto the nib too quickly and it overflows, which has happened to me a few times – you can use rubbing alcohol to help clean it up. I personally like the convenience of small, pre-packaged alcohol wipes, which are perfect for cleaning alcohol markers, so I keep a box of them on my desk.
Once you’ve refilled your Copic marker a few times you’ll get good at doing it quite quickly and cleanly. You’ll also gain an intuitive sense for how many drops your marker needs at any given time to bring it back to life.
Another way to refill using the old design
You can also use the technique I demonstrated with the new bottle and remove the chisel/broad nib with tweezers to drop the ink directly into the chamber. This isn’t quite as easy with the old bottle because of the shorter nozzle, but as long you’re careful not to make a mess, it works just fine.
Copic used to offer a “booster needle” that screws on to the ink bottle to allow you to more precisely squeeze the ink into the chamber. But Copic no longer mentions this on their website and now only recommends you do the drop method outlined above. Regardless, I found the needle method annoying because you still have to remove the nib and afterwards you’d have to flush and clean the needle so that you don’t mix colors.
Tip: If you do decide to remove your nib to refill your marker, don’t remove the brush nib because it’s more delicate (made from two different pieces of felt) and could be damaged. Only remove the chisel/broad nib for refill purposes.
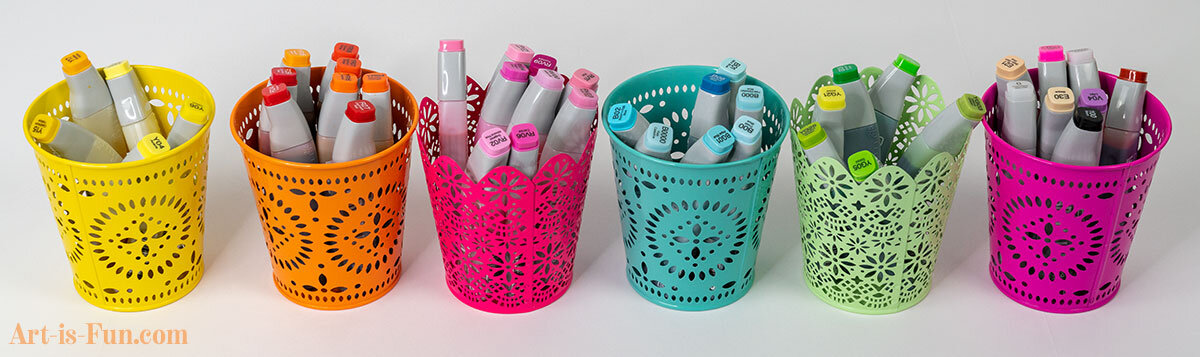
How I store my Copic Marker Ink Refills
Alcohol Marker Videos
Check out my YouTube channel for videos on how to use alcohol markers! Here are some videos where I demonstrate my alcohol marker techiques:
If you enjoy my videos, be sure to subscribe to my channel so that you never miss a thing! 😃
Ultimate Guide to Using Alcohol Markers
If you’d like to learn how to use alcohol markers to create professional-quality works of art, sign up for my Ultimate Guide to Using Alcohol Markers and discover the secrets to making beautiful alcohol marker art!
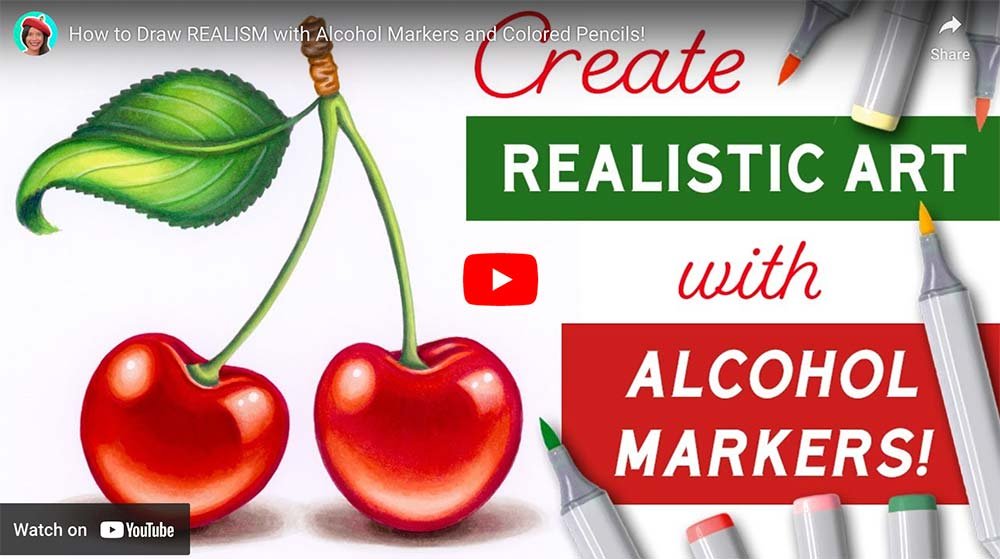
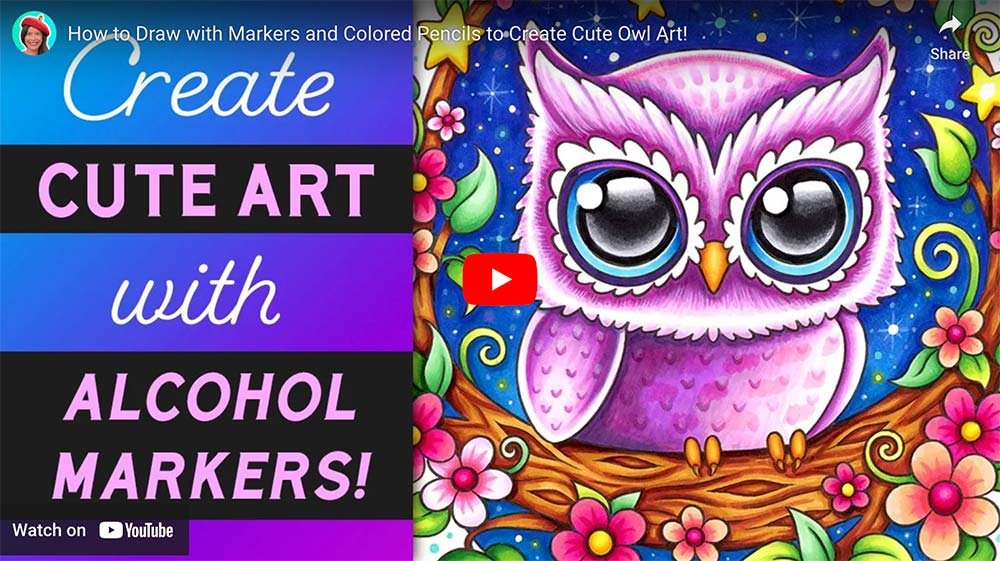
In this comprehensive online art class, you’ll go from a complete beginner level to an advanced level, with over 11 hours of step-by-step instructional video! We’ll start with blending basics and blending theory, then move on to detailed demonstrations for coloring in the luminescent mandala, whimsical owl, and realistic cherries shown below!
Plus, enjoy bonus lessons about using alcohol markers with other media, as well as various marker maintenance and trouble-shooting topics. With over 50 pages of downloadable resources, you can follow along at home, at your own pace!
Click below to watch the course trailer and see everything that you’ll get in this course!

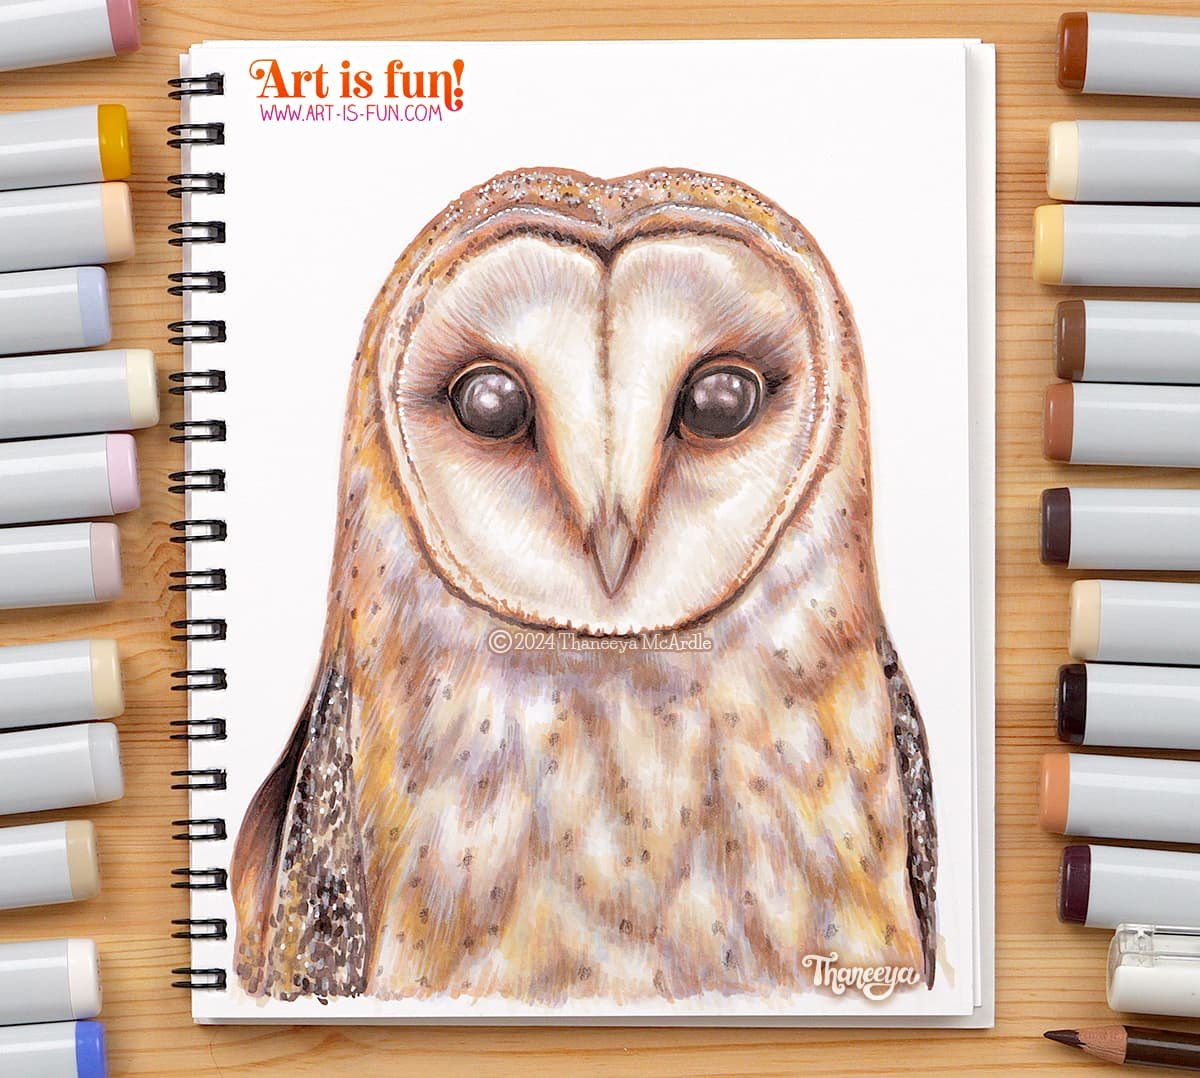
How to Draw Realism with Copic Markers
Check out my video and tutorial where I demonstrate the Copic blending techniques that I used to draw this realistic owl from scratch using Copic Markers:
Learn more about Copic Markers
If you’d like to learn more about Copics – such as the difference between Classic, Sketch, and Ciao markers – check out my page Copic Markers: A Beginner’s Guide for a detailed explanation of Copic Markers.