Colored Pencil Tools
The Best Accessories for Colored Pencils
Colored pencils are one my favorite mediums because you can achieve so much without the need for many additional tools or accessories. With just a piece of paper and a sharpener, your colored pencils can bring your creative vision to life with minimal cost or preparation!
However, it’s important that you pick the right essential tools for use with colored pencils (like sharpeners and erasers), and learn about other tools–like blenders–that can help you do even more with your colored pencils!
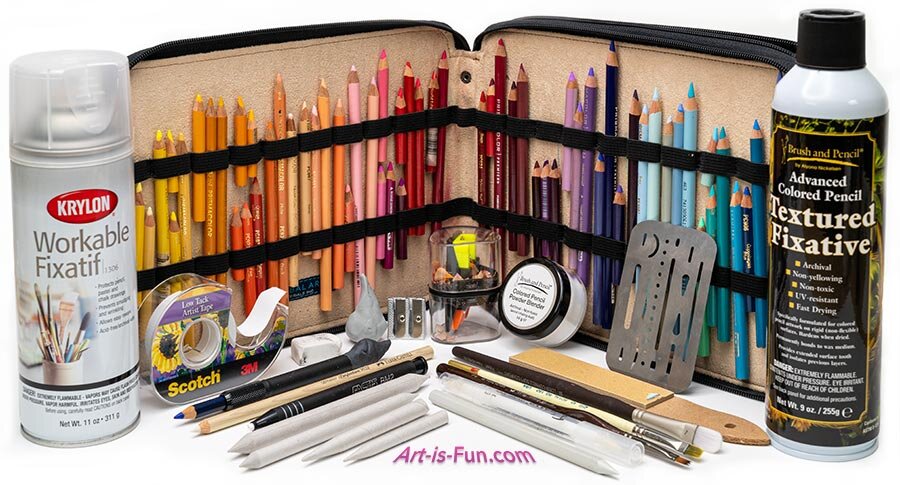
Some of the tools and accessories I use with colored pencils
In this article I'm going to begin by looking at sharpeners and erasers, the two tools that you'll definitely need. I then address optional tools like fixative, blenders, and other tools that make drawing and coloring easier.
Pencil Sharpeners
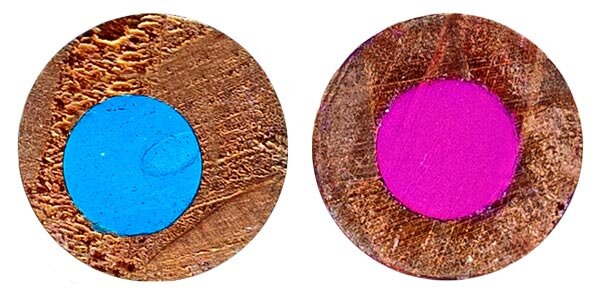
Misaligned pencils don’t sharpen well. Make sure the lead is centered.
Buying the right pencil sharpener is important because an inferior sharpener will slow you down, produce a dull point, and could even damage your pencils—and you definitely don’t want that!
Tip: Even the best sharpener can't make up for a cheap set of pencils. If the lead is prone to breakage or it’s misaligned within the wooden shaft, you're going to have issues with sharpening and using them. This is something to keep in mind when you're buying your colored pencils, and check out this article I wrote about how to prevent breakage in your colored pencils.
There are several types of sharpeners, so let’s discuss some important factors that will affect your decision when choosing which colored pencil sharpener to buy.
Factors to consider
Ease of use. If your hands are arthritic or you hate being delayed by tedious sharpening, consider an electric or hand crank sharpener.
Pencil size. It's best to seek out sharpeners with at least 2 holes (for regular and fat pencils). Even if you only use standard pencils, the larger hole can be useful.

Cheap sharpeners can give you a dull point
Point shape. Sharpeners of most types are capable of giving you a long, sharp point, but results vary depending on how well the product is made. A cheap sharpener may produce a shorter point, that is duller at the tip.
Quality electric sharpeners can produce a very sharp point, but can be wasteful. If you want full control and the ability to create custom point shapes, you might want to try using a utility knife. This method is popular with some artists, but it's slower and not recommended for beginners.
Portability. If you like to travel or don't have the luxury of a studio space, a handheld sharpener is probably your best bet. You can get battery-operated electric sharpeners, but they're still somewhat bulky and less-reliable.
Now let's take a look at the different types of sharpeners in more detail.
I've provided links below to the relevant products so that you can easily find them on Amazon. As an Amazon Associate, I earn from qualifying purchases (at no additional cost to you), which helps support this site.
Handheld sharpeners
Because I like to work in different locations, I’ve always favored handheld sharpeners. They're reasonably priced, portable, and shouldn't damage your pencils if you use them properly. They’re slower than electric sharpeners, but you have more control. To learn more about how to properly use a handheld sharpener, see my article How to Sharpen a Colored Pencil.
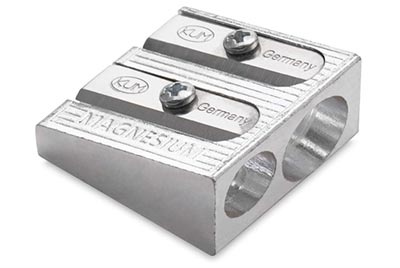
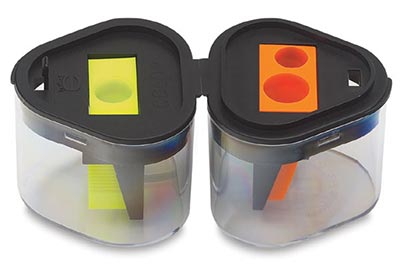
The Kum Pencil Sharpener is very sturdy and offers replaceable blades. I also frequently use General's 3-in-1 Sharpener, which has separate openings for graphite and colored pencils. The blades aren’t replaceable, but they’re sharp and long-lasting. I also appreciate the built-in containers to catch the shavings, so I don't make a mess when I'm not near a trash can. This has become my favorite pencil sharpener to take with me when I'm traveling, and I also use it when I'm at home and want to draw or color outside, or while comfortably curled up on the couch.
Electric sharpeners
If your hands get tired with handheld sharpeners or you want to save time, it's worth considering an electric sharpener. A decent model will give you a long, sharp point, and also have an auto-stop feature to prevent wasteful oversharpening. The downside is that they can be expensive, and you have less control than you do with a handheld sharpener. You just poke the pencil in and hope for the best. Even with the autostop feature, they can still wear down your pencils more quickly, which is something to keep in mind if you have an expensive set. It helps to buy a sharpener with helical (spiral) blades, which do a much better job with colored pencils and are gentler on the core.
Some manufacturers warn against using colored pencils with their sharpeners because the wax can gradually clog up the blades. But I've found that semi-regular cleaning is enough to prevent any issues. Running a graphite pencil through it from time to time will also help grease the blades and keep it running smoothly.
If you hate the idea of a bulky appliance always taking up room on your desk, these days you can get excellent battery-powered sharpeners that are portable and very effective. The models with helical blades work the best, but are still a bit bulky. You can get models with straight blades that are more compact and still work quite well.


Manual hand crank sharpeners
I’ve heard mixed reports about hand crank sharpeners. I’ve personally had subpar experiences with them, but I know a few artists who love them, so felt it was worth mentioning so you can decide for yourself whether you want to give them a try. Cheap models can mangle your pencils, and they have to be mounted to your desk or a wall, which can be a hassle. On the other hand, a decent model like the Derwent SuperPoint Manual Pencil Sharpener is much faster than a handheld sharpener and can stand up to a lot of abuse. Plus you don’t have to worry about any electrical components failing.
Sandpaper Blocks
For point sharpening you can use a Sandpaper Block (or even just a piece of sandpaper taped nearby). This is a quick way to refine the point or create a custom shape (e.g. a wedge).

Erasers
Colored pencils are tricky to erase, especially if you've applied several layers, but they're certainly not as permanent as markers. You can lighten your colors, but it's difficult to remove them completely, and you can't be too aggressive because you risk damaging your paper.
The right eraser for you can depend on your drawing surface. If you use a hard eraser on soft paper, you may damage it. Likewise, if the eraser is too soft, it will tend to just smear the pigment and not erase anything.
Erasers are cheap, and as you'll see below, you'll typically use several different types depending on whether you want to erase, lighten or blend.
Kneaded Eraser
To help fund this site, we receive a small commission from purchases made via the links below.
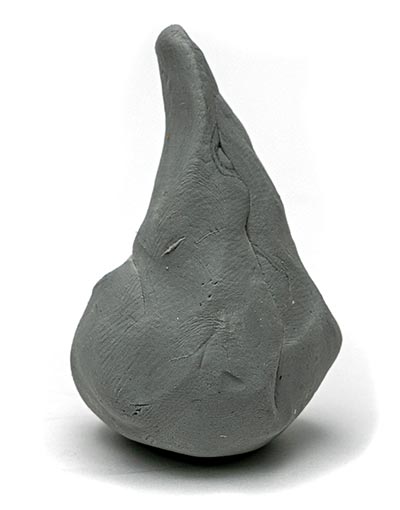
I most commonly use a Kneaded Eraser in my work. It can't fully erase colored pencils, but it's fantastic for lightening, lifting smudges, and cleaning up debris.
I love that it can be molded into a custom shape for precision (like in the nearby photo). Once molded into shape, it is then typically dabbed (rather than rubbed) onto the surface of the paper. It won't damage your paper, and when it gets dirty, just knead it a few times and you'll have a clean surface again. Blue tack or puddy adhesive can be used in a similar manner.
White plastic or vinyl eraser
Plastic or vinyl erasers are best used on whiter areas (with less pigment), and for blending. If you need to erase heavily pigmented areas, start off with a kneaded eraser. Avoid the pink pearl erasers, and colored erasers in general, because they're often hard and can stain your paper.
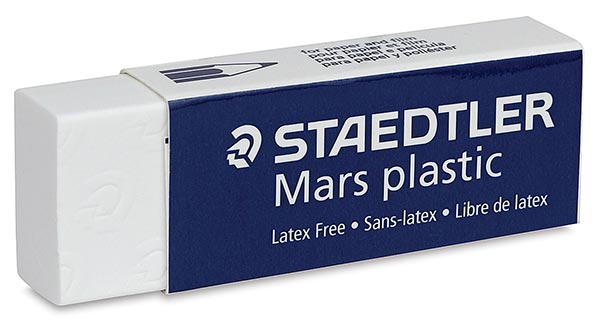
It's common to buy plastic erasers in brick form, which some artists cut with a knife to make custom shapes. You can also get mechanical erasers (kind of like mechanical pencils) that are easy to hold and are great for smaller details, like bringing out highlights. For even more precision, you can buy eraser pencils, which can be sharpened just like regular pencils, but contain a hard eraser instead of lead. Some eraser pencils also come with a handy brush on the other end to help you easily remove debris and residue!


Tip: keep some scrap paper or sandpaper nearby to rub your eraser on in between uses. This keeps it clean and prevents you from transferring unwanted pigment.
Electric eraser
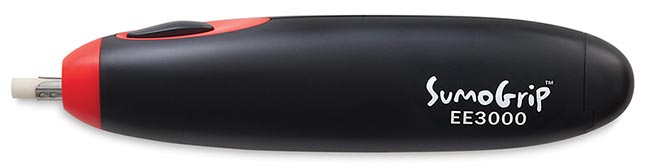
If you want more erasing power, electric erasers are your best bet. Most are battery-operated (rather than wired) and work by spinning the little nib when you press the button. The nibs are generally made from white plastic eraser, and are easily replaceable and quite inexpensive.
Electric erasers do most of the work for you, which is especially useful if you have arthritis or do a lot of erasing. They can sometimes erase back to the white of the paper, although some pigments do stain. This gives you more flexibility to undo your mistakes or create bright highlights. However, it's not a subtle tool. If you just want to lighten your colors, use your kneaded eraser. Agressive use can damage paper, but electric erasers are typically safer than clumsy block erasers.
If you make a purchase via the links below we receive a small commission, which helps support this site.
The Sakura Cordless Electric Eraser is widely considered the best product on the market. I love mine! It feels good in the hand, erases well, and is small enough to easily take on location. Currently, the Sakura SumoGrip costs around $35, which some people find too expensive. There are cheaper products, but they tend to suffer from reliability issues. If you're on a budget, the Derwent Battery-Operated Eraser gets good reviews and costs a fraction of the Sakura.
Other erasing tools
For more precise erasure, especially useful for highlights, you can get an inexpensive erasing shield. Low-tack masking tape is also a quick and easy way to lift off some pigment without risk of damaging your paper.
Fixative
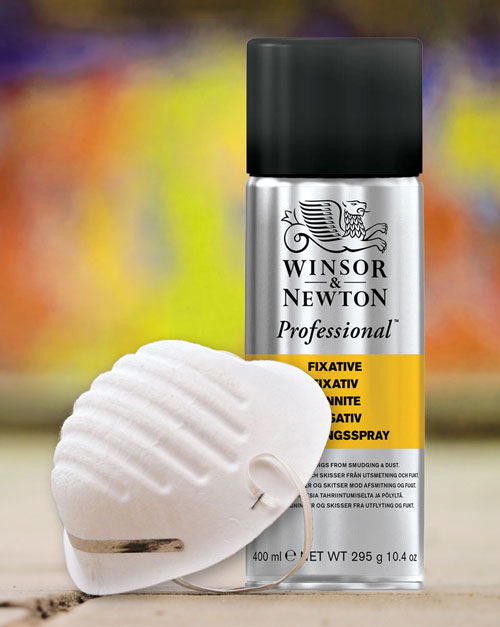
Fixative is not essential, but it can help keep wax bloom at bay, and be very useful if you tend to apply multiple layers of colored pencil. These days it's common to buy fixatives in convenient spray cans that should be used outside or in a very well-ventilated room (make sure you follow the directions on the can). Be aware that fixative can affect the appearance of your colors, typically shifting, boosting or darkening them. This has the potential to ruin an artwork, so you should always do test sprays on sample artworks to prevent surprises.
There are two main types that can be separate or combined into a single product: workable and final fixatives.
Workable fixative
Workable fixative is best purchased in a matte finish and has two main functions: it seals the layers below so that they won't become smudged, and it adds texture so that you can continue adding more layers of colored pencil. This will be especially useful if you like smooth paper that has minimal tooth.
Final fixative
Final fixative is applied to finished artworks and keeps out UV rays and oxygen that might cause your colors to fade over time. It can also prevent wax bloom, which is a common-side effect of using wax-based pencils like Prismacolors (oil-based pencils don't suffer from this as much). Over time, wax will rise to the surface and give your artwork a dull look. It can be wiped away with a soft cloth, but to keep it at bay permanently, you need to use a fixative.
Note that some fixatives, like the textured fixative I recommend below, are best used on rigid surfaces because they harden when dry, which can result in cracking. This is another good reason to always read the guidelines on the can and do your own tests. It's a matter of experimentation to find the right fixative product for your art style.
We receive a small commission (at no extra cost to you) from purchases made via the links below.


Blenders
Colored pencils become wonderfully versatile once you start blending them because you can create beautifully smooth gradients and tonal transitions. Some artists today are using colored pencils to make artworks that almost look like oil paintings!
You can blend your colored pencils in a number of different ways. The most common method, and the one I use most in my work, is to carefully layer your colors. It can take some practice to do well, but it's easy and immediate. You can further blend your colors by using friction to move the pigments around. This can be achieved with erasers, tortillons (paper stumps, shown below) or cotton swabs.

One of my favorite blending tools is the Caran d'Ache Full Blender. It's basically a solid stick of soft wax shaped like a pencil. It can be sharpened and works with both oil-based and wax-based pencils. It's effective at blending and also has a glossy, intensifying effect on your colors. It's what I reach for when I'm blending small areas, but when it comes to larger areas, you need to look to the following tools, which all facilitate blending by weakening the binder in coloring pencils.

Odorless mineral spirits
You can use small amounts of mineral spirits, applied with a brush or cotton swab, to dissolve the binder and blend your colored pencils. Some artists will also use baby oil in a similar manner.
Alcohol-based blender marker
A convenient approach for wax-based colored pencils is to use an alcohol-based marker that doesn't contain pigment. The Finesse Colored Pencil Blender I've displayed below is designed specifically for colored pencils, but any marker blender will do (e.g. like those made by Copic or Ohuhu). The alcohol in the marker will act like a solvent to break down the binder and allow you to spread the pigment more easily.

Make sure you clean the marker tip on a piece of paper in between uses so that you don't transfer residual color.
If you make a purchase via the links below we receive a small commission (at no extra cost to you), which helps support this site.
Powder blender
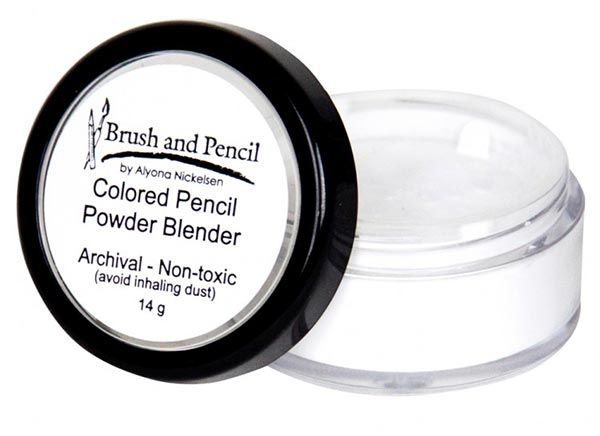
Colored Pencil Powder Blender is a relatively new product that can be very effective, but it's rather slow and takes time to master.
With a small brush or sponge applicator you apply a small amount of powder (which is invisible unless you use too much), and it inhibits the binder, acting as a kind of lubricant. This means that you can essentially push or brush the pigment around the surface to blend and mix colors. For a visual demonstration, see this video by Alyona Nickelsen of Brush and Pencil.
Powder blender is especially handy when you want to create smooth, streak-free backgrounds. It also makes the colored pencil much easier to erase using a kneaded eraser. You just dab the surface and the pigment will come off.
The downside to powder blender is that it only works on non-absorbent, textured paper (like a sanded pastel paper), and it needs to be sealed with a fixative to prevent smudging. The blender also doesn't work with heavy layers of pencil, so if you want darker tones you to need apply multiple layers, spraying each layer with textured fixative. This can really slow you down because you have to wait 15-20min for each layer of fixative to dry.
Other Tools
Pencil Extenders
Pencil extenders, also called pencil holders or lengtheners, help you save money by getting more out of your stubs. They'll also reduce the hand fatigue that you can get from wielding short pencils. One annoying aspect of extenders is that they often don't hold pencils tight enough during sharpening, so you might have to remove the pencil each time.

An alternative to pencil extenders is to glue your pencil stub onto the flat end of a new pencil.
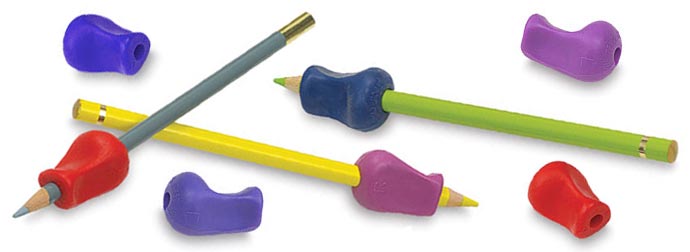
Pencil Grips
If your hands get sore when you're drawing or coloring, which is especially common for people with arthritis, you might benefit from pencil grips. I know how annoying it can be when your creative flow is derailed because of hand fatigue!
Brushes
Brushes have two main uses with colored pencils: for softly brushing away debris, and for applying solvent or blender.
Its common for stray crumbs of pigment or eraser debris to accumulate on your drawing surface. Rather than use your hand to swipe it away and risk smudging your paper, use a soft brush to lightly brush it away. I like to use this cute Unicorn Makeup Brush, which has super soft bristles that won't damage your artwork. Some artists also use compressed air, which you can buy in handy spray cans.

It can also be useful to have some brushes for applying solvent or powder blender. If you don't own any brushes, I'd recommend starting off with an inexpensive synthetic brush that will allow you to experiment and decide if it's a technique you'll adopt into your workflow. Depending on the degree of blending you're doing (e.g. small areas vs. large backgrounds) you'll need brushes in a few different sizes and shapes.
Cases and Holders
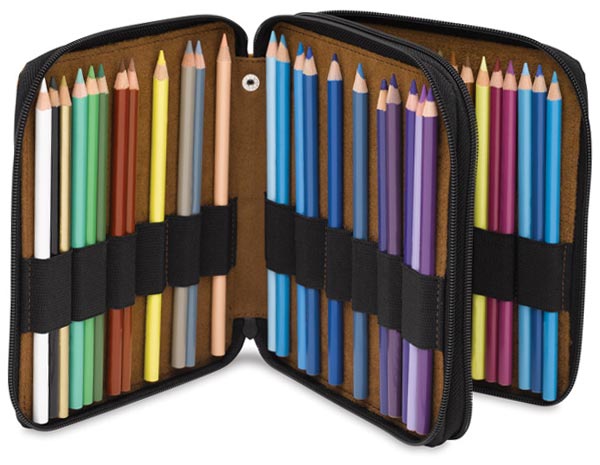
Convenient storage is not just useful, but also necessary to protect your pencils. Rough treatment, like dropping your pencils or allowing them to rattle around in a case, can break the lead within the shaft, which makes sharpening difficult.
Your pencils are best stored flat, but it's fine to keep them upright, as long as they're not resting on their points. The right case for you is largely a matter of personal preference, based partly on whether you need portability.
If your pencils mainly stay in your studio, it's fine to store them in simple cups or even something homemade (like a large block of wood with pencil-sized holes drilled into it). I like to draw on location, so I use a folding leather case that secures each pencil to keep them organized and protected from damage.
Drawing board

If you're using single sheets of paper - discussed in my Best Paper for Colored Pencils article - you'll need to tape it to a rigid board, unless you own an easel or a drawing table.
You can buy drawing boards designed for that very purpose or use something homemade.
Just be aware of the texture of the board, which can be transferred to your paper and show up in your finished drawing. For example, a rough board can result in your drawing having a more mottled appearance rather than a smooth appearance. I always use a smooth drawing board to avoid that kind of texture transfer, but if you can't find a smooth drawing board, you can buffer your drawing by placing several additional sheets or paper underneath your drawing paper, which also creates a more giving surface to work on.
I hope this info about colored pencil tools and accessories has been useful to you! If you’re interested in learning more about colored pencils, check out my other colored pencil articles listed below!
Related Content

Best Colored Pencils
Best Paper for Colored Pencils
Guide to Buying Art Supplies
Best Colored Pencil Techniques for Realism
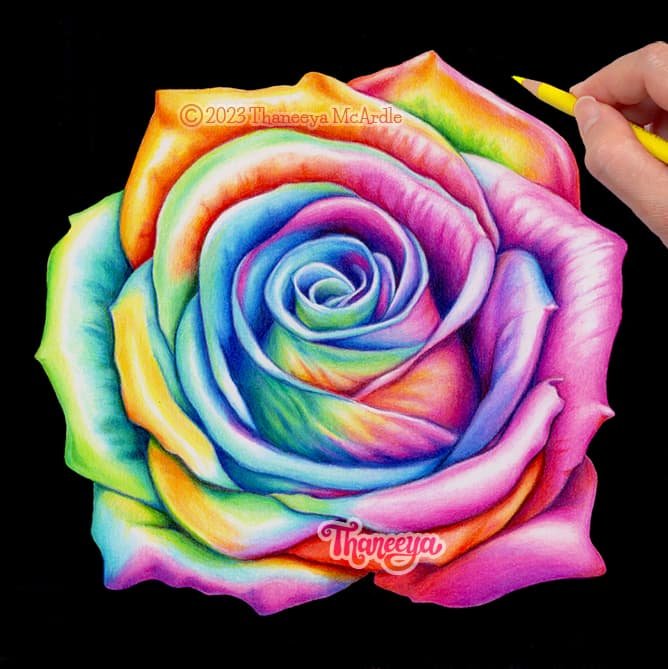
Follow along as I draw the rainbow rose above and share with you my top tips and techniques for drawing realism with colored pencils!


